<?xml version="1.0" encoding="utf-8"?><feed xmlns="http://www.w3.org/2005/Atom" ><generator uri="https://jekyllrb.com/" version="4.4.1">Jekyll</generator><link href="https://paramount.tech/feed.xml" rel="self" type="application/atom+xml" /><link href="https://paramount.tech/" rel="alternate" type="text/html" /><updated>2026-06-10T12:49:51+00:00</updated><id>https://paramount.tech/feed.xml</id><title type="html">Paramount Tech</title><subtitle>At Paramount, our employees and the work they do are brought together and driven forward by a shared set of values. These values live side-by-side with our best business practices, and are inspired by the spirit,  ingenuity and integrity that our people bring to work every single day, around the world.
</subtitle><entry><title type="html">Wednesday Links - Edition 2025-12-24 🎅🎄🎁</title><link href="https://paramount.tech/blog/2025/12/24/wednesday-links.html" rel="alternate" type="text/html" title="Wednesday Links - Edition 2025-12-24 🎅🎄🎁" /><published>2025-12-24T00:00:00+00:00</published><updated>2025-12-24T00:00:00+00:00</updated><id>https://paramount.tech/blog/2025/12/24/wednesday-links</id><content type="html" xml:base="https://paramount.tech/blog/2025/12/24/wednesday-links.html"><![CDATA[<p>Building a Fast, Memory-Efficient Hash Table in Java (by borrowing the best ideas) (15 min)🧮<br />
<a href="https://bluuewhale.github.io/posts/building-a-fast-and-memory-efficient-hash-table-in-java-by-borrowing-the-best-ideas/">https://bluuewhale.github.io/posts/building-a-fast-and-memory-efficient-hash-table-in-java-by-borrowing-the-best-ideas/</a></p>

<p>Next level Kotlin support in Spring Boot 4 (5 min)🔧<br />
<a href="https://spring.io/blog/2025/12/18/next-level-kotlin-support-in-spring-boot-4">https://spring.io/blog/2025/12/18/next-level-kotlin-support-in-spring-boot-4</a></p>

<p>Startup CPU Boost in Kubernetes with In-Place Pod Resize (8 min)🚀<br />
<a href="https://piotrminkowski.com/2025/12/22/startup-cpu-boost-in-kubernetes-with-in-place-pod-resize/">https://piotrminkowski.com/2025/12/22/startup-cpu-boost-in-kubernetes-with-in-place-pod-resize/</a></p>

<p>Vibe Coding Against OWASP Top10 2025 (14 min)🤖<br />
<a href="https://softwaremill.com/vibe-coding-against-owasp-top-10-2025/">https://softwaremill.com/vibe-coding-against-owasp-top-10-2025/</a></p>

<p>More series can be found <a href="https://dev.to/0xkkocel/series/6965">here</a>.</p>]]></content><author><name>Krzysztof Kocel</name></author><category term="blog" /><summary type="html"><![CDATA[Building a Fast, Memory-Efficient Hash Table in Java (by borrowing the best ideas) (15 min)🧮 https://bluuewhale.github.io/posts/building-a-fast-and-memory-efficient-hash-table-in-java-by-borrowing-the-best-ideas/]]></summary></entry><entry><title type="html">BringIntoViewSpec introduction</title><link href="https://paramount.tech/blog/2025/03/03/jetpack-compose-bringintoviewspec-intro.html" rel="alternate" type="text/html" title="BringIntoViewSpec introduction" /><published>2025-03-03T00:00:00+00:00</published><updated>2025-03-03T00:00:00+00:00</updated><id>https://paramount.tech/blog/2025/03/03/jetpack-compose-bringintoviewspec-intro</id><content type="html" xml:base="https://paramount.tech/blog/2025/03/03/jetpack-compose-bringintoviewspec-intro.html"><![CDATA[<h1 id="bringintoviewspec-introduction">BringIntoViewSpec introduction</h1>

<h2 id="introduction">Introduction</h2>
<p>In July 2024 we could see the first alpha version of Jetpack Compose tv foundation library, that deprecated <code class="language-plaintext highlighter-rouge">TvLazyColumn</code> and <code class="language-plaintext highlighter-rouge">TvLazyRow</code>. In January 2025 we got release of tv-foundation 1.0.0, where those composables are gone for good. But what has happened to them? How can we replace them?</p>

<h2 id="purpose-of-tvlazy-containers">Purpose of TvLazy* containers</h2>
<p>First of all let me tell you what problems were solved by those <code class="language-plaintext highlighter-rouge">TvLazy*</code> Compsables. TVs are obviously very different devices than standard Android phones/tablets. The key difference is how user interacts with the UI. On TV there’s no touch interface, everything happens with the use of remote. This means we need to ensure that items remain visible when the user moves the focus. This is precisely why <code class="language-plaintext highlighter-rouge">TvLazyColumn</code> and <code class="language-plaintext highlighter-rouge">TvLazyRow</code> were introduced. We could provide <code class="language-plaintext highlighter-rouge">pivotOffset</code> parameter which was aligning the items to the position that developers/designers wanted.
For instance <code class="language-plaintext highlighter-rouge">TvLazyColumn</code> aligned the focused item (the red rectangle in the GIF below) to a specific screen position (here 30% of the screen height). Each focused item was moved to the same position, as long as scrolling allowed (see “Item 0”, which is moved as close to 30%, as can be):</p>

<p><img src="https://cdn-images-1.medium.com/max/1600/1*yXPpJSh-Vyb4eQmTwKRmrQ.gif" width="600" alt="GIF" style="display: block; margin: auto;" /></p>

<p>Pivot on <code class="language-plaintext highlighter-rouge">LazyColumn</code>/<code class="language-plaintext highlighter-rouge">TvLazyRow</code> was working in the same way, but in the other axis:</p>

<p><img src="https://cdn-images-1.medium.com/max/1600/1*sCh2a3IcmnVQ5dwg_0jLRA.gif" width="600" alt="GIF" style="display: block; margin: auto;" /></p>

<h2 id="replacement">Replacement</h2>
<p>Now that these composables are gone, how can we achieve the same behaviour? We should be using standard <code class="language-plaintext highlighter-rouge">LazyColumn</code> and <code class="language-plaintext highlighter-rouge">LazyRow</code>. But it doesn’t mean that they will behave in the same way on both mobile and Tv. Google introduced a thing called <code class="language-plaintext highlighter-rouge">BringIntoViewSpec</code> along with <code class="language-plaintext highlighter-rouge">LocalBringIntoViewSpec</code>, which is a composition local, that is internally read by scrollables to provide the behaviour that we desire. By providing different instances of <code class="language-plaintext highlighter-rouge">BringIntoViewSpec</code> via <code class="language-plaintext highlighter-rouge">LocalBringIntoViewSpec</code>, we can achieve different behaviours. Let’s see Google’s implementation for <code class="language-plaintext highlighter-rouge">LocalBringIntoViewSpec</code>:</p>
<div class="language-kotlin highlighter-rouge"><div class="highlight"><pre class="highlight"><code><span class="n">actual</span> <span class="kd">val</span> <span class="py">LocalBringIntoViewSpec</span><span class="p">:</span> <span class="nc">ProvidableCompositionLocal</span><span class="p">&lt;</span><span class="nc">BringIntoViewSpec</span><span class="p">&gt;</span> <span class="p">=</span>
    <span class="nf">compositionLocalWithComputedDefaultOf</span> <span class="p">{</span>
        <span class="kd">val</span> <span class="py">hasTvFeature</span> <span class="p">=</span>
        <span class="nc">LocalContext</span><span class="p">.</span><span class="n">currentValue</span><span class="p">.</span><span class="n">packageManager</span><span class="p">.</span><span class="nf">hasSystemFeature</span><span class="p">(</span><span class="nc">FEATURE_LEANBACK</span><span class="p">)</span>
        <span class="k">if</span> <span class="p">(!</span><span class="n">hasTvFeature</span><span class="p">)</span> <span class="p">{</span>
            <span class="nc">DefaultBringIntoViewSpec</span>
        <span class="p">}</span> <span class="k">else</span> <span class="p">{</span>
            <span class="nc">PivotBringIntoViewSpec</span>
        <span class="p">}</span>
<span class="p">}</span>
</code></pre></div></div>
<p>This piece of code makes sure that the behaviour of <code class="language-plaintext highlighter-rouge">LazyColumn</code> and <code class="language-plaintext highlighter-rouge">LazyRow</code> on TV and mobile in terms of item alignment is different. It provides different <code class="language-plaintext highlighter-rouge">BringIntoViewSpec</code>s depending on the type of the device the code is run on. We’ve already seen the expected behaviour on TV, so let’s see how does it behave on mobile device:</p>

<p><img src="https://cdn-images-1.medium.com/max/1600/1*djmlJE7HzsQTRbrd6w_GyA.gif" width="600" alt="GIF" style="display: block; margin: auto;" /></p>

<p>As you can see, now the focused item is moved only as much as it needs to be moved, to be fully visible. If it is completely visible - no scrolling takes place. If you’ve ever worked with accessibility engines, such as Talkback, you’ve probably noticed, that that’s exactly what happens when user walks over the items in such a layout.
If you want to try it on your device, here’s the code for it:</p>
<div class="language-kotlin highlighter-rouge"><div class="highlight"><pre class="highlight"><code><span class="nd">@Composable</span>
<span class="k">fun</span> <span class="nf">BringIntoViewSpecFun</span><span class="p">(</span><span class="n">modifier</span><span class="p">:</span> <span class="nc">Modifier</span> <span class="p">=</span> <span class="nc">Modifier</span><span class="p">)</span> <span class="p">{</span>
    <span class="nc">LazyColumn</span><span class="p">(</span>
        <span class="n">horizontalAlignment</span> <span class="p">=</span> <span class="nc">Alignment</span><span class="p">.</span><span class="nc">CenterHorizontally</span><span class="p">,</span>
        <span class="n">verticalArrangement</span> <span class="p">=</span> <span class="nc">Arrangement</span><span class="p">.</span><span class="nf">spacedBy</span><span class="p">(</span><span class="mi">8</span><span class="p">.</span><span class="n">dp</span><span class="p">),</span>
        <span class="n">modifier</span> <span class="p">=</span> <span class="n">modifier</span><span class="p">,</span>
    <span class="p">)</span> <span class="p">{</span>
        <span class="nf">items</span><span class="p">(</span><span class="mi">10</span><span class="p">)</span> <span class="p">{</span> <span class="n">index</span> <span class="p">-&gt;</span>
            <span class="kd">val</span> <span class="py">interactionSource</span> <span class="p">=</span> <span class="nf">remember</span> <span class="p">{</span> <span class="nc">MutableInteractionSource</span><span class="p">()</span> <span class="p">}</span>
            <span class="kd">val</span> <span class="py">isFocused</span> <span class="k">by</span> <span class="n">interactionSource</span><span class="p">.</span><span class="nf">collectIsFocusedAsState</span><span class="p">()</span>
            <span class="nc">Box</span><span class="p">(</span>
                <span class="n">modifier</span> <span class="p">=</span> <span class="nc">Modifier</span>
                    <span class="p">.</span><span class="nf">focusable</span><span class="p">(</span><span class="n">interactionSource</span> <span class="p">=</span> <span class="n">interactionSource</span><span class="p">)</span>
                    <span class="p">.</span><span class="nf">size</span><span class="p">(</span><span class="mi">200</span><span class="p">.</span><span class="n">dp</span><span class="p">)</span>
                    <span class="p">.</span><span class="nf">background</span><span class="p">(</span><span class="k">if</span> <span class="p">(</span><span class="n">isFocused</span><span class="p">)</span> <span class="nc">Color</span><span class="p">.</span><span class="nc">Red</span> <span class="k">else</span> <span class="nc">Color</span><span class="p">.</span><span class="nc">Gray</span><span class="p">),</span>
                <span class="n">contentAlignment</span> <span class="p">=</span> <span class="nc">Alignment</span><span class="p">.</span><span class="nc">Center</span><span class="p">,</span>
            <span class="p">)</span> <span class="p">{</span>
                <span class="nc">Text</span><span class="p">(</span><span class="n">text</span> <span class="p">=</span> <span class="s">"Item $index"</span><span class="p">)</span>
            <span class="p">}</span>
        <span class="p">}</span>
    <span class="p">}</span>
<span class="p">}</span>
</code></pre></div></div>

<h2 id="how-to-use-bringintoviewspec">How to use BringIntoViewSpec?</h2>
<p>What is <code class="language-plaintext highlighter-rouge">BringIntoViewSpec</code> then? It’s a simple interface, which has field <code class="language-plaintext highlighter-rouge">val scrollAnimationSpec: AnimationSpec&lt;Float&gt;</code> and a method <code class="language-plaintext highlighter-rouge">fun calculateScrollDistance(offset: Float, size: Float, containerSize: Float)</code>.
<code class="language-plaintext highlighter-rouge">scrollAnimationSpec</code> defines how should the scroll look like. Don’t get too used to it, as it’s already deprecated in the newest versions of lib.
<code class="language-plaintext highlighter-rouge">calculateScrollDistance</code>’s job is to provide by how many pixels we need to scroll our scrollable container, to make the view placed where we want it to be.
So far so good, but what if we want to customise the defaults? We just have to create our custom <code class="language-plaintext highlighter-rouge">BringIntoViewSpec</code> implementation and provide it with use of <code class="language-plaintext highlighter-rouge">CompositionLocalProvider</code>. Let’s use the Google’s implementation of <code class="language-plaintext highlighter-rouge">PivotBringIntoViewSpec</code> and modify it a bit, so that we can easily specify the alignment line:</p>
<div class="language-kotlin highlighter-rouge"><div class="highlight"><pre class="highlight"><code><span class="kd">class</span> <span class="nc">CustomBringIntoViewSpec</span><span class="p">(</span>
    <span class="k">private</span> <span class="kd">val</span> <span class="py">parentFraction</span><span class="p">:</span> <span class="nc">Float</span><span class="p">,</span>
    <span class="k">private</span> <span class="kd">val</span> <span class="py">childFraction</span><span class="p">:</span> <span class="nc">Float</span><span class="p">,</span>
<span class="p">)</span> <span class="p">:</span> <span class="nc">BringIntoViewSpec</span> <span class="p">{</span>

    <span class="k">override</span> <span class="kd">val</span> <span class="py">scrollAnimationSpec</span><span class="p">:</span> <span class="nc">AnimationSpec</span><span class="p">&lt;</span><span class="nc">Float</span><span class="p">&gt;</span> <span class="p">=</span> <span class="o">..</span><span class="p">.</span>

    <span class="k">override</span> <span class="k">fun</span> <span class="nf">calculateScrollDistance</span><span class="p">(</span><span class="n">offset</span><span class="p">:</span> <span class="nc">Float</span><span class="p">,</span> <span class="n">size</span><span class="p">:</span> <span class="nc">Float</span><span class="p">,</span> <span class="n">containerSize</span><span class="p">:</span> <span class="nc">Float</span><span class="p">):</span> <span class="nc">Float</span> <span class="p">{</span>
        <span class="kd">val</span> <span class="py">leadingEdgeOfItemRequestingFocus</span> <span class="p">=</span> <span class="n">offset</span>
        <span class="kd">val</span> <span class="py">trailingEdgeOfItemRequestingFocus</span> <span class="p">=</span> <span class="n">offset</span> <span class="p">+</span> <span class="n">size</span>

        <span class="kd">val</span> <span class="py">sizeOfItemRequestingFocus</span> <span class="p">=</span>
            <span class="nf">abs</span><span class="p">(</span><span class="n">trailingEdgeOfItemRequestingFocus</span> <span class="p">-</span> <span class="n">leadingEdgeOfItemRequestingFocus</span><span class="p">)</span>
        <span class="kd">val</span> <span class="py">childSmallerThanParent</span> <span class="p">=</span> <span class="n">sizeOfItemRequestingFocus</span> <span class="p">&lt;=</span> <span class="n">containerSize</span>
        <span class="kd">val</span> <span class="py">initialTargetForLeadingEdge</span> <span class="p">=</span>
            <span class="p">(</span><span class="n">parentFraction</span> <span class="p">*</span> <span class="n">containerSize</span><span class="p">)</span> <span class="p">-</span>
                    <span class="p">(</span><span class="n">childFraction</span> <span class="p">*</span> <span class="n">sizeOfItemRequestingFocus</span><span class="p">)</span>
        <span class="kd">val</span> <span class="py">spaceAvailableToShowItem</span> <span class="p">=</span> <span class="n">containerSize</span> <span class="p">-</span> <span class="n">initialTargetForLeadingEdge</span>

        <span class="kd">val</span> <span class="py">targetForLeadingEdge</span> <span class="p">=</span>
            <span class="k">if</span> <span class="p">(</span><span class="n">childSmallerThanParent</span> <span class="p">&amp;&amp;</span> <span class="n">spaceAvailableToShowItem</span> <span class="p">&lt;</span> <span class="n">sizeOfItemRequestingFocus</span><span class="p">)</span> <span class="p">{</span>
                <span class="n">containerSize</span> <span class="p">-</span> <span class="n">sizeOfItemRequestingFocus</span>
            <span class="p">}</span> <span class="k">else</span> <span class="p">{</span>
                <span class="n">initialTargetForLeadingEdge</span>
            <span class="p">}</span>

        <span class="k">return</span> <span class="n">leadingEdgeOfItemRequestingFocus</span> <span class="p">-</span> <span class="n">targetForLeadingEdge</span>
    <span class="p">}</span>
<span class="p">}</span>
</code></pre></div></div>
<p>And now we can provide it to our <code class="language-plaintext highlighter-rouge">LazyColumn</code>/<code class="language-plaintext highlighter-rouge">LazyRow</code>. Here’s the code in case we want the start of the focused child to be at the 0% of screen width:</p>
<div class="language-kotlin highlighter-rouge"><div class="highlight"><pre class="highlight"><code><span class="nd">@OptIn</span><span class="p">(</span><span class="nc">ExperimentalFoundationApi</span><span class="o">::</span><span class="k">class</span><span class="p">)</span>
<span class="nd">@Composable</span>
<span class="k">fun</span> <span class="nf">BringIntoViewSpecFun</span><span class="p">(</span><span class="n">modifier</span><span class="p">:</span> <span class="nc">Modifier</span> <span class="p">=</span> <span class="nc">Modifier</span><span class="p">)</span> <span class="p">{</span>
    <span class="kd">val</span> <span class="py">bivs</span> <span class="p">=</span> <span class="nf">remember</span> <span class="p">{</span> <span class="nc">CustomBringIntoViewSpec</span><span class="p">(</span><span class="mf">0f</span><span class="p">,</span> <span class="mf">0f</span><span class="p">)</span> <span class="p">}</span>
    <span class="nc">CompositionLocalProvider</span><span class="p">(</span><span class="nc">LocalBringIntoViewSpec</span> <span class="n">provides</span> <span class="n">bivs</span><span class="p">)</span> <span class="p">{</span>
        <span class="nc">LazyRow</span><span class="p">(</span>
            <span class="n">verticalAlignment</span> <span class="p">=</span> <span class="nc">Alignment</span><span class="p">.</span><span class="nc">CenterVertically</span><span class="p">,</span>
            <span class="n">horizontalArrangement</span> <span class="p">=</span> <span class="nc">Arrangement</span><span class="p">.</span><span class="nf">spacedBy</span><span class="p">(</span><span class="mi">8</span><span class="p">.</span><span class="n">dp</span><span class="p">),</span>
            <span class="n">modifier</span> <span class="p">=</span> <span class="n">modifier</span><span class="p">,</span>
        <span class="p">)</span> <span class="p">{</span>
            <span class="nf">items</span><span class="p">(</span><span class="mi">10</span><span class="p">)</span> <span class="p">{</span> <span class="n">index</span> <span class="p">-&gt;</span>
                <span class="kd">val</span> <span class="py">interactionSource</span> <span class="p">=</span> <span class="nf">remember</span> <span class="p">{</span> <span class="nc">MutableInteractionSource</span><span class="p">()</span> <span class="p">}</span>
                <span class="kd">val</span> <span class="py">isFocused</span> <span class="k">by</span> <span class="n">interactionSource</span><span class="p">.</span><span class="nf">collectIsFocusedAsState</span><span class="p">()</span>
                <span class="nc">Box</span><span class="p">(</span>
                    <span class="n">modifier</span> <span class="p">=</span> <span class="nc">Modifier</span>
                        <span class="p">.</span><span class="nf">focusable</span><span class="p">(</span><span class="n">interactionSource</span> <span class="p">=</span> <span class="n">interactionSource</span><span class="p">)</span>
                        <span class="p">.</span><span class="nf">size</span><span class="p">(</span><span class="mi">200</span><span class="p">.</span><span class="n">dp</span><span class="p">)</span>
                        <span class="p">.</span><span class="nf">background</span><span class="p">(</span><span class="k">if</span> <span class="p">(</span><span class="n">isFocused</span><span class="p">)</span> <span class="nc">Color</span><span class="p">.</span><span class="nc">Red</span> <span class="k">else</span> <span class="nc">Color</span><span class="p">.</span><span class="nc">Gray</span><span class="p">),</span>
                    <span class="n">contentAlignment</span> <span class="p">=</span> <span class="nc">Alignment</span><span class="p">.</span><span class="nc">Center</span><span class="p">,</span>
                <span class="p">)</span> <span class="p">{</span>
                    <span class="nc">Text</span><span class="p">(</span><span class="n">text</span> <span class="p">=</span> <span class="s">"Item $index"</span><span class="p">)</span>
                <span class="p">}</span>
            <span class="p">}</span>
        <span class="p">}</span>
    <span class="p">}</span>
<span class="p">}</span>
</code></pre></div></div>
<p>And it works like that:</p>

<p><img src="https://cdn-images-1.medium.com/max/1600/1*88ufkQ4PGyqQ3JK5Cfmoow.gif" width="600" alt="GIF" style="display: block; margin: auto;" /></p>

<p>You can see that items 6, 7, 8 and 9 are not aligned to the beginning of the screen, as LazyRow cannot scroll anymore. In case we want all items to be aligned to the position set by <code class="language-plaintext highlighter-rouge">BringViewIntoSpec</code>, we can achieve that by setting <code class="language-plaintext highlighter-rouge">contentPadding</code> of our container:</p>
<div class="language-kotlin highlighter-rouge"><div class="highlight"><pre class="highlight"><code><span class="nd">@OptIn</span><span class="p">(</span><span class="nc">ExperimentalFoundationApi</span><span class="o">::</span><span class="k">class</span><span class="p">)</span>
<span class="nd">@Composable</span>
<span class="k">fun</span> <span class="nf">BringIntoViewSpecFun</span><span class="p">(</span><span class="n">modifier</span><span class="p">:</span> <span class="nc">Modifier</span> <span class="p">=</span> <span class="nc">Modifier</span><span class="p">)</span> <span class="p">{</span>
    <span class="kd">val</span> <span class="py">bivs</span> <span class="p">=</span> <span class="nf">remember</span> <span class="p">{</span> <span class="nc">CustomBringIntoViewSpec</span><span class="p">(</span><span class="mf">0f</span><span class="p">,</span> <span class="mf">0f</span><span class="p">)</span> <span class="p">}</span>
    <span class="nc">CompositionLocalProvider</span><span class="p">(</span><span class="nc">LocalBringIntoViewSpec</span> <span class="n">provides</span> <span class="n">bivs</span><span class="p">)</span> <span class="p">{</span>
        <span class="kd">val</span> <span class="py">lazyListState</span> <span class="p">=</span> <span class="nf">rememberLazyListState</span><span class="p">()</span>
        <span class="kd">val</span> <span class="py">density</span> <span class="p">=</span> <span class="nc">LocalDensity</span><span class="p">.</span><span class="n">current</span>
        <span class="kd">val</span> <span class="py">viewPortWidth</span> <span class="k">by</span> <span class="nf">remember</span> <span class="p">{</span>
            <span class="nf">derivedStateOf</span> <span class="p">{</span>
                <span class="nf">with</span><span class="p">(</span><span class="n">density</span><span class="p">)</span> <span class="p">{</span> <span class="n">lazyListState</span><span class="p">.</span><span class="n">layoutInfo</span><span class="p">.</span><span class="n">viewportSize</span><span class="p">.</span><span class="n">width</span><span class="p">.</span><span class="nf">toDp</span><span class="p">()</span> <span class="p">}</span>
            <span class="p">}</span>
        <span class="p">}</span>
        <span class="nc">LazyRow</span><span class="p">(</span>
            <span class="n">state</span> <span class="p">=</span> <span class="n">lazyListState</span><span class="p">,</span>
            <span class="n">verticalAlignment</span> <span class="p">=</span> <span class="nc">Alignment</span><span class="p">.</span><span class="nc">CenterVertically</span><span class="p">,</span>
            <span class="n">horizontalArrangement</span> <span class="p">=</span> <span class="nc">Arrangement</span><span class="p">.</span><span class="nf">spacedBy</span><span class="p">(</span><span class="mi">8</span><span class="p">.</span><span class="n">dp</span><span class="p">),</span>
            <span class="n">contentPadding</span> <span class="p">=</span> <span class="nc">PaddingValues</span><span class="p">(</span><span class="n">end</span> <span class="p">=</span> <span class="n">viewPortWidth</span><span class="p">),</span>
            <span class="n">modifier</span> <span class="p">=</span> <span class="n">modifier</span><span class="p">,</span>
        <span class="p">)</span> <span class="p">{</span>
            <span class="nf">items</span><span class="p">(</span><span class="mi">10</span><span class="p">)</span> <span class="p">{</span> <span class="n">index</span> <span class="p">-&gt;</span>
                <span class="kd">val</span> <span class="py">interactionSource</span> <span class="p">=</span> <span class="nf">remember</span> <span class="p">{</span> <span class="nc">MutableInteractionSource</span><span class="p">()</span> <span class="p">}</span>
                <span class="kd">val</span> <span class="py">isFocused</span> <span class="k">by</span> <span class="n">interactionSource</span><span class="p">.</span><span class="nf">collectIsFocusedAsState</span><span class="p">()</span>
                <span class="nc">Box</span><span class="p">(</span>
                    <span class="n">modifier</span> <span class="p">=</span> <span class="nc">Modifier</span>
                        <span class="p">.</span><span class="nf">focusable</span><span class="p">(</span><span class="n">interactionSource</span> <span class="p">=</span> <span class="n">interactionSource</span><span class="p">)</span>
                        <span class="p">.</span><span class="nf">size</span><span class="p">(</span><span class="mi">200</span><span class="p">.</span><span class="n">dp</span><span class="p">)</span>
                        <span class="p">.</span><span class="nf">background</span><span class="p">(</span><span class="k">if</span> <span class="p">(</span><span class="n">isFocused</span><span class="p">)</span> <span class="nc">Color</span><span class="p">.</span><span class="nc">Red</span> <span class="k">else</span> <span class="nc">Color</span><span class="p">.</span><span class="nc">Gray</span><span class="p">),</span>
                    <span class="n">contentAlignment</span> <span class="p">=</span> <span class="nc">Alignment</span><span class="p">.</span><span class="nc">Center</span><span class="p">,</span>
                <span class="p">)</span> <span class="p">{</span>
                    <span class="nc">Text</span><span class="p">(</span><span class="n">text</span> <span class="p">=</span> <span class="s">"Item $index"</span><span class="p">)</span>
                <span class="p">}</span>
            <span class="p">}</span>
        <span class="p">}</span>
    <span class="p">}</span>
<span class="p">}</span>
</code></pre></div></div>
<p>Instead of using any arbitrary value of padding end, I’ve used viewport width, as it is minimum amount that will make the view behave as we want:</p>

<p><img src="https://cdn-images-1.medium.com/max/1600/1*jGNAhrDDXwZpu_MDTCEB2w.gif" width="600" alt="GIF" style="display: block; margin: auto;" /></p>

<p>In our <code class="language-plaintext highlighter-rouge">CustomBringIntoViewSpec</code> I’ve defined <code class="language-plaintext highlighter-rouge">parentFraction</code>, as well as <code class="language-plaintext highlighter-rouge">childFraction</code>. <code class="language-plaintext highlighter-rouge">childFraction</code> defines which part of the child we want to be aligned. <code class="language-plaintext highlighter-rouge">0f</code> means start of the child, <code class="language-plaintext highlighter-rouge">0.5f</code> stands for the middle and <code class="language-plaintext highlighter-rouge">1f</code> is the end of the child. For example if we want each focused item to be placed exactly at the center of the screen, we can do it like that:</p>
<div class="language-kotlin highlighter-rouge"><div class="highlight"><pre class="highlight"><code><span class="nd">@OptIn</span><span class="p">(</span><span class="nc">ExperimentalFoundationApi</span><span class="o">::</span><span class="k">class</span><span class="p">)</span>
<span class="nd">@Composable</span>
<span class="k">fun</span> <span class="nf">BringIntoViewSpecFun</span><span class="p">(</span><span class="n">modifier</span><span class="p">:</span> <span class="nc">Modifier</span> <span class="p">=</span> <span class="nc">Modifier</span><span class="p">)</span> <span class="p">{</span>
    <span class="kd">val</span> <span class="py">bivs</span> <span class="p">=</span> <span class="nf">remember</span> <span class="p">{</span> <span class="nc">CustomBringIntoViewSpec</span><span class="p">(</span><span class="mf">0.5f</span><span class="p">,</span> <span class="mf">0.5f</span><span class="p">)</span> <span class="p">}</span>
    <span class="nc">CompositionLocalProvider</span><span class="p">(</span><span class="nc">LocalBringIntoViewSpec</span> <span class="n">provides</span> <span class="n">bivs</span><span class="p">)</span> <span class="p">{</span>
        <span class="kd">val</span> <span class="py">lazyListState</span> <span class="p">=</span> <span class="nf">rememberLazyListState</span><span class="p">()</span>
        <span class="kd">val</span> <span class="py">density</span> <span class="p">=</span> <span class="nc">LocalDensity</span><span class="p">.</span><span class="n">current</span>
        <span class="kd">val</span> <span class="py">horizontalPadding</span> <span class="k">by</span> <span class="nf">remember</span> <span class="p">{</span>
            <span class="nf">derivedStateOf</span> <span class="p">{</span>
                <span class="nf">with</span><span class="p">(</span><span class="n">density</span><span class="p">)</span> <span class="p">{</span> <span class="n">lazyListState</span><span class="p">.</span><span class="n">layoutInfo</span><span class="p">.</span><span class="n">viewportSize</span><span class="p">.</span><span class="n">width</span><span class="p">.</span><span class="nf">toDp</span><span class="p">()</span> <span class="p">/</span> <span class="mi">2</span> <span class="p">}</span>
            <span class="p">}</span>
        <span class="p">}</span>
        <span class="nc">LazyRow</span><span class="p">(</span>
            <span class="n">state</span> <span class="p">=</span> <span class="n">lazyListState</span><span class="p">,</span>
            <span class="n">verticalAlignment</span> <span class="p">=</span> <span class="nc">Alignment</span><span class="p">.</span><span class="nc">CenterVertically</span><span class="p">,</span>
            <span class="n">horizontalArrangement</span> <span class="p">=</span> <span class="nc">Arrangement</span><span class="p">.</span><span class="nf">spacedBy</span><span class="p">(</span><span class="mi">8</span><span class="p">.</span><span class="n">dp</span><span class="p">),</span>
            <span class="n">contentPadding</span> <span class="p">=</span> <span class="nc">PaddingValues</span><span class="p">(</span><span class="n">horizontal</span> <span class="p">=</span> <span class="n">horizontalPadding</span><span class="p">),</span>
            <span class="n">modifier</span> <span class="p">=</span> <span class="n">modifier</span><span class="p">,</span>
        <span class="p">)</span> <span class="p">{</span>
            <span class="nf">items</span><span class="p">(</span><span class="mi">10</span><span class="p">)</span> <span class="p">{</span> <span class="n">index</span> <span class="p">-&gt;</span>
                <span class="kd">val</span> <span class="py">interactionSource</span> <span class="p">=</span> <span class="nf">remember</span> <span class="p">{</span> <span class="nc">MutableInteractionSource</span><span class="p">()</span> <span class="p">}</span>
                <span class="kd">val</span> <span class="py">isFocused</span> <span class="k">by</span> <span class="n">interactionSource</span><span class="p">.</span><span class="nf">collectIsFocusedAsState</span><span class="p">()</span>
                <span class="nc">Box</span><span class="p">(</span>
                    <span class="n">modifier</span> <span class="p">=</span> <span class="nc">Modifier</span>
                        <span class="p">.</span><span class="nf">focusable</span><span class="p">(</span><span class="n">interactionSource</span> <span class="p">=</span> <span class="n">interactionSource</span><span class="p">)</span>
                        <span class="p">.</span><span class="nf">size</span><span class="p">(</span><span class="mi">200</span><span class="p">.</span><span class="n">dp</span><span class="p">)</span>
                        <span class="p">.</span><span class="nf">background</span><span class="p">(</span><span class="k">if</span> <span class="p">(</span><span class="n">isFocused</span><span class="p">)</span> <span class="nc">Color</span><span class="p">.</span><span class="nc">Red</span> <span class="k">else</span> <span class="nc">Color</span><span class="p">.</span><span class="nc">Gray</span><span class="p">),</span>
                    <span class="n">contentAlignment</span> <span class="p">=</span> <span class="nc">Alignment</span><span class="p">.</span><span class="nc">Center</span><span class="p">,</span>
                <span class="p">)</span> <span class="p">{</span>
                    <span class="nc">Text</span><span class="p">(</span><span class="n">text</span> <span class="p">=</span> <span class="s">"Item $index"</span><span class="p">)</span>
                <span class="p">}</span>
            <span class="p">}</span>
        <span class="p">}</span>
    <span class="p">}</span>
<span class="p">}</span>
</code></pre></div></div>
<p>By setting both parent and child fraction to <code class="language-plaintext highlighter-rouge">0.5f</code>, we’re telling that we want to align center of each child to the center of the screen. That’s how it looks like on the device:</p>

<p><img src="https://cdn-images-1.medium.com/max/1600/1*h5uNx18fyiEZVxDIxm16ig.gif" width="600" alt="GIF" style="display: block; margin: auto;" /></p>

<p>What is important is that the same <code class="language-plaintext highlighter-rouge">BringViewIntoSpec</code> can be reused - it will work with <code class="language-plaintext highlighter-rouge">LazyColumn</code> and <code class="language-plaintext highlighter-rouge">LazyRow</code> (as well as with all <code class="language-plaintext highlighter-rouge">Lazy*Grids</code>).</p>

<p>There’s also another typical use case, I can think of - aligning the focused item to the specific value, let’s say <code class="language-plaintext highlighter-rouge">80.dp</code>. It might be tempting to calculate what percentage of the screen our <code class="language-plaintext highlighter-rouge">80.dp</code> is, but we can do it in a simpler way. We need another parameter at our <code class="language-plaintext highlighter-rouge">CustomBringIntoViewSpec</code>:</p>
<div class="language-kotlin highlighter-rouge"><div class="highlight"><pre class="highlight"><code><span class="kd">class</span> <span class="nc">CustomBringIntoViewSpec</span><span class="p">(</span>
    <span class="k">private</span> <span class="kd">val</span> <span class="py">parentFraction</span><span class="p">:</span> <span class="nc">Float</span><span class="p">,</span>
    <span class="k">private</span> <span class="kd">val</span> <span class="py">childFraction</span><span class="p">:</span> <span class="nc">Float</span><span class="p">,</span>
    <span class="k">private</span> <span class="kd">val</span> <span class="py">parentStartOffsetPx</span><span class="p">:</span> <span class="nc">Int</span> <span class="p">=</span> <span class="mi">0</span><span class="p">,</span>
<span class="p">)</span> <span class="p">:</span> <span class="nc">BringIntoViewSpec</span> <span class="p">{</span>

    <span class="k">override</span> <span class="kd">val</span> <span class="py">scrollAnimationSpec</span><span class="p">:</span> <span class="nc">AnimationSpec</span><span class="p">&lt;</span><span class="nc">Float</span><span class="p">&gt;</span> <span class="p">=</span> <span class="o">..</span><span class="p">.</span>

    <span class="k">override</span> <span class="k">fun</span> <span class="nf">calculateScrollDistance</span><span class="p">(</span><span class="n">offset</span><span class="p">:</span> <span class="nc">Float</span><span class="p">,</span> <span class="n">size</span><span class="p">:</span> <span class="nc">Float</span><span class="p">,</span> <span class="n">containerSize</span><span class="p">:</span> <span class="nc">Float</span><span class="p">):</span> <span class="nc">Float</span> <span class="p">{</span>
        <span class="kd">val</span> <span class="py">leadingEdgeOfItemRequestingFocus</span> <span class="p">=</span> <span class="n">offset</span>
        <span class="kd">val</span> <span class="py">trailingEdgeOfItemRequestingFocus</span> <span class="p">=</span> <span class="n">offset</span> <span class="p">+</span> <span class="n">size</span>

        <span class="kd">val</span> <span class="py">sizeOfItemRequestingFocus</span> <span class="p">=</span>
            <span class="nf">abs</span><span class="p">(</span><span class="n">trailingEdgeOfItemRequestingFocus</span> <span class="p">-</span> <span class="n">leadingEdgeOfItemRequestingFocus</span><span class="p">)</span>
        <span class="kd">val</span> <span class="py">childSmallerThanParent</span> <span class="p">=</span> <span class="n">sizeOfItemRequestingFocus</span> <span class="p">&lt;=</span> <span class="n">containerSize</span>
        <span class="kd">val</span> <span class="py">initialTargetForLeadingEdge</span> <span class="p">=</span>
            <span class="p">(</span><span class="n">parentFraction</span> <span class="p">*</span> <span class="n">containerSize</span><span class="p">)</span> <span class="p">+</span>
                    <span class="n">parentStartOffsetPx</span> <span class="p">-</span>
                    <span class="p">(</span><span class="n">childFraction</span> <span class="p">*</span> <span class="n">sizeOfItemRequestingFocus</span><span class="p">)</span>
        <span class="kd">val</span> <span class="py">spaceAvailableToShowItem</span> <span class="p">=</span> <span class="n">containerSize</span> <span class="p">-</span> <span class="n">initialTargetForLeadingEdge</span>

        <span class="kd">val</span> <span class="py">targetForLeadingEdge</span> <span class="p">=</span>
            <span class="k">if</span> <span class="p">(</span><span class="n">childSmallerThanParent</span> <span class="p">&amp;&amp;</span> <span class="n">spaceAvailableToShowItem</span> <span class="p">&lt;</span> <span class="n">sizeOfItemRequestingFocus</span><span class="p">)</span> <span class="p">{</span>
                <span class="n">containerSize</span> <span class="p">-</span> <span class="n">sizeOfItemRequestingFocus</span>
            <span class="p">}</span> <span class="k">else</span> <span class="p">{</span>
                <span class="n">initialTargetForLeadingEdge</span>
            <span class="p">}</span>

        <span class="k">return</span> <span class="n">leadingEdgeOfItemRequestingFocus</span> <span class="p">-</span> <span class="n">targetForLeadingEdge</span>
    <span class="p">}</span>
<span class="p">}</span>
</code></pre></div></div>
<p>Now we can provide offset from the <code class="language-plaintext highlighter-rouge">parentFraction</code>, which is exactly what we want.</p>
<div class="language-kotlin highlighter-rouge"><div class="highlight"><pre class="highlight"><code><span class="nd">@OptIn</span><span class="p">(</span><span class="nc">ExperimentalFoundationApi</span><span class="o">::</span><span class="k">class</span><span class="p">)</span>
<span class="nd">@Composable</span>
<span class="k">fun</span> <span class="nf">BringIntoViewSpecFun</span><span class="p">(</span><span class="n">modifier</span><span class="p">:</span> <span class="nc">Modifier</span> <span class="p">=</span> <span class="nc">Modifier</span><span class="p">)</span> <span class="p">{</span>
    <span class="kd">val</span> <span class="py">density</span> <span class="p">=</span> <span class="nc">LocalDensity</span><span class="p">.</span><span class="n">current</span>
    <span class="kd">val</span> <span class="py">parentStartOffset</span> <span class="p">=</span> <span class="mi">80</span><span class="p">.</span><span class="n">dp</span>
    <span class="kd">val</span> <span class="py">parentStartOffsetPx</span> <span class="p">=</span> <span class="nf">with</span><span class="p">(</span><span class="n">density</span><span class="p">)</span> <span class="p">{</span> <span class="n">parentStartOffset</span><span class="p">.</span><span class="nf">roundToPx</span><span class="p">()</span> <span class="p">}</span>
    <span class="kd">val</span> <span class="py">bivs</span> <span class="p">=</span> <span class="nf">remember</span> <span class="p">{</span> <span class="nc">CustomBringIntoViewSpec</span><span class="p">(</span><span class="mf">0f</span><span class="p">,</span> <span class="mf">0f</span><span class="p">,</span> <span class="n">parentStartOffsetPx</span><span class="p">)</span> <span class="p">}</span>
    <span class="nc">CompositionLocalProvider</span><span class="p">(</span><span class="nc">LocalBringIntoViewSpec</span> <span class="n">provides</span> <span class="n">bivs</span><span class="p">)</span> <span class="p">{</span>
        <span class="nc">LazyRow</span><span class="p">(</span>
            <span class="n">verticalAlignment</span> <span class="p">=</span> <span class="nc">Alignment</span><span class="p">.</span><span class="nc">CenterVertically</span><span class="p">,</span>
            <span class="n">horizontalArrangement</span> <span class="p">=</span> <span class="nc">Arrangement</span><span class="p">.</span><span class="nf">spacedBy</span><span class="p">(</span><span class="mi">8</span><span class="p">.</span><span class="n">dp</span><span class="p">),</span>
            <span class="n">contentPadding</span> <span class="p">=</span> <span class="nc">PaddingValues</span><span class="p">(</span><span class="n">start</span> <span class="p">=</span> <span class="n">parentStartOffset</span><span class="p">),</span>
            <span class="n">modifier</span> <span class="p">=</span> <span class="n">modifier</span><span class="p">,</span>
        <span class="p">)</span> <span class="p">{</span>
            <span class="nf">items</span><span class="p">(</span><span class="mi">10</span><span class="p">)</span> <span class="p">{</span> <span class="n">index</span> <span class="p">-&gt;</span>
                <span class="kd">val</span> <span class="py">interactionSource</span> <span class="p">=</span> <span class="nf">remember</span> <span class="p">{</span> <span class="nc">MutableInteractionSource</span><span class="p">()</span> <span class="p">}</span>
                <span class="kd">val</span> <span class="py">isFocused</span> <span class="k">by</span> <span class="n">interactionSource</span><span class="p">.</span><span class="nf">collectIsFocusedAsState</span><span class="p">()</span>
                <span class="nc">Box</span><span class="p">(</span>
                    <span class="n">modifier</span> <span class="p">=</span> <span class="nc">Modifier</span>
                        <span class="p">.</span><span class="nf">focusable</span><span class="p">(</span><span class="n">interactionSource</span> <span class="p">=</span> <span class="n">interactionSource</span><span class="p">)</span>
                        <span class="p">.</span><span class="nf">size</span><span class="p">(</span><span class="mi">200</span><span class="p">.</span><span class="n">dp</span><span class="p">)</span>
                        <span class="p">.</span><span class="nf">background</span><span class="p">(</span><span class="k">if</span> <span class="p">(</span><span class="n">isFocused</span><span class="p">)</span> <span class="nc">Color</span><span class="p">.</span><span class="nc">Red</span> <span class="k">else</span> <span class="nc">Color</span><span class="p">.</span><span class="nc">Gray</span><span class="p">),</span>
                    <span class="n">contentAlignment</span> <span class="p">=</span> <span class="nc">Alignment</span><span class="p">.</span><span class="nc">Center</span><span class="p">,</span>
                <span class="p">)</span> <span class="p">{</span>
                    <span class="nc">Text</span><span class="p">(</span><span class="n">text</span> <span class="p">=</span> <span class="s">"Item $index"</span><span class="p">)</span>
                <span class="p">}</span>
            <span class="p">}</span>
        <span class="p">}</span>
    <span class="p">}</span>
<span class="p">}</span>
</code></pre></div></div>
<p>And just like that we got ourselves nice padding:</p>

<p><img src="https://cdn-images-1.medium.com/max/1600/1*yEtTDjSKpWazfilxdi7lQw.gif" width="600" alt="GIF" style="display: block; margin: auto;" /></p>

<h2 id="conclusion">Conclusion</h2>
<p>As you can see Google gave us quite scalable and well-thought API to work with. Thanks to removal of TvLazy* layouts, we now have a code that is much more reusable, as all we have to change right now is just the <code class="language-plaintext highlighter-rouge">LocalBringIntoViewSpec</code> and the same code will work well on mobile as well as on TVs.</p>

<p>I hope this article helps with your implementation. Stay tuned for the next article, where I’ll present more sophisticated usages of this API.</p>]]></content><author><name>Karol Ksionek</name></author><category term="blog" /><summary type="html"><![CDATA[BringIntoViewSpec introduction]]></summary></entry><entry><title type="html">Coping with snapshot tests on different machines architecture.</title><link href="https://paramount.tech/blog/2025/01/24/snapshot-tests-precision.html" rel="alternate" type="text/html" title="Coping with snapshot tests on different machines architecture." /><published>2025-01-24T00:00:00+00:00</published><updated>2025-01-24T00:00:00+00:00</updated><id>https://paramount.tech/blog/2025/01/24/snapshot-tests-precision</id><content type="html" xml:base="https://paramount.tech/blog/2025/01/24/snapshot-tests-precision.html"><![CDATA[<p>At Paramount, we use snapshot tests to ensure that the visual layer of our applications is properly tested. Snapshot tests check if the next iterations of the application didn’t break anything in existing views. This is achieved by rendering pieces of code and comparing this render with the predefined reference image. If images are identical, the test passes; otherwise, it fails.</p>

<p>Unfortunately, the rendering outcome depends on the architecture of the machine on which we run tests. Images are identical to the human eye, but the image comparator detects even the slightest change. In our project, we have plenty of rounded corners, image blurs, and gradients that are differently rendered on Intel-Mac vs ARM-Mac, and our CI infrastructure still relies on some Intel-based Macs.</p>

<p>To solve this problem, the author of the snapshot tests SDK introduced two similar parameters that can be specified:</p>

<ul>
  <li>Precision</li>
  <li>Perceptual precision</li>
</ul>

<p>Their usage is quite different: Precision measures the percentage of identical pixels between the newly created image and the reference image.
Perceptual precision checks the most significant deviation of color for any pixel, which means it focuses on color difference.
Perceptual precision is perfect for gradient-based views – ARM-based Macs render them slightly different than Intel-based ones.
The default value for both is 100%. If just one of the parameters succeeds in comparison, the whole test is marked as successful. That’s why if we don’t specify perceptual precision (as we currently don’t have it specified in our codebase), only the overall number of identical pixels is checked.</p>

<p>Here are a few examples of failing tests:
1). Let’s check how the snapshot test performs for images with gradient and rounded corners:</p>

<p style="text-align: center; width: 800pt; height: auto"><img src="/blog/img/snapshot-tests-precision/snapshot-tests-precision-1.png" alt="" /></p>

<p>Most of the pixels are identical 99%, but it is actually ~98% for the color differences. This is not a big difference to the human eye.
Here is an example of a login screen for the BET+ application where we have a blurry background:</p>

<p style="text-align: center; width: 800pt; height: auto"><img src="/blog/img/snapshot-tests-precision/snapshot-tests-precision-2.png" alt="" /></p>

<p>The most significant color difference for a single pixel in the example above is around 8%, but to the human eye, the difference is not visible at all.
2). For the second test, let’s use a similar image but with slightly different text:
This test text was changed from expected “Text” to “Test”. Here are the key results:</p>

<p style="text-align: center; width: 800pt; height: auto"><img src="/blog/img/snapshot-tests-precision/snapshot-tests-precision-3.png" alt="" /></p>

<p>As you can see above, the overall percentage of pixels that are identical in color to the reference is over 99%. However, since the text is different on the reference image, the perceptual precision dropped to 24%. This change is visible to the human eye, and well-written snapshot tests should fail.</p>

<p>3). For the 3rd test, let’s check if snapshot testing detects tiny visual artifacts.</p>

<p style="text-align: center; width: 800pt; height: auto"><img src="/blog/img/snapshot-tests-precision/snapshot-tests-precision-4.png" alt="" /></p>

<p>Are there any downsides to perceptual precision? Running a test suite takes significantly longer than regular snapshot tests. Below is a comparison table:</p>

<p style="text-align: center; width: 800pt; height: auto"><img src="/blog/img/snapshot-tests-precision/snapshot-tests-precision-5.png" alt="" /></p>

<p>Conclusion:
Until all our build machines have the same processor architecture, we should use Perceptual Precision when necessary. This ensures test reliability, which is our top priority.</p>]]></content><author><name>Marcin Gorny</name></author><category term="blog" /><summary type="html"><![CDATA[At Paramount, we use snapshot tests to ensure that the visual layer of our applications is properly tested. Snapshot tests check if the next iterations of the application didn’t break anything in existing views. This is achieved by rendering pieces of code and comparing this render with the predefined reference image. If images are identical, the test passes; otherwise, it fails.]]></summary></entry><entry><title type="html">Jetpack Compose and Nested Scrolling</title><link href="https://paramount.tech/blog/2025/01/15/jetpack-compose-nested-scrolling.html" rel="alternate" type="text/html" title="Jetpack Compose and Nested Scrolling" /><published>2025-01-15T00:00:00+00:00</published><updated>2025-01-15T00:00:00+00:00</updated><id>https://paramount.tech/blog/2025/01/15/jetpack-compose-nested-scrolling</id><content type="html" xml:base="https://paramount.tech/blog/2025/01/15/jetpack-compose-nested-scrolling.html"><![CDATA[<h1 id="jetpack-compose-and-nested-scrolling">Jetpack Compose and Nested Scrolling</h1>

<p>Jetpack Compose is a great way to implement your UI. It allows us to easily create screens that look great, and finally, we, Android developers, can forget about XML. That’s how Jetpack Compose enthusiasts and evangelists paint the world. But is it that simple?
At Paramount, we work on streaming applications. If you’ve ever seen one, you know that its most basic concept is a carousel of posters. The user needs an easy and intuitive way to pick a movie or series to watch. A common feature in such applications is stacking multiple carousels vertically.</p>

<p><img src="https://cdn-images-1.medium.com/max/1600/1*i7_KWcLeoTlVx38806pifw.png" width="200" alt="Screenshot of Paramount+ application with carousels visible" style="display: block; margin: auto;" /></p>

<p>It really can be done in an effortless and elegant way with Jetpack Compose. The code would look something like this:</p>
<div class="language-plaintext highlighter-rouge"><div class="highlight"><pre class="highlight"><code>LazyColumn {
    items(carousels) { carousel -&gt;
         Column {
             Title(carousel.title)
             Spacer(…)
             LazyRow {
                 items(carousel.items) { item -&gt;
                     Poster(item)
                 }
             }
         }
     }
}
</code></pre></div></div>
<p>And that’s it. We have a <code class="language-plaintext highlighter-rouge">LazyColumn</code>, so we’re efficient in terms of memory, rendering only the carousels visible to the user, <code class="language-plaintext highlighter-rouge">LazyRow</code> takes care of rendering only the posters that are visible. We can scroll horizontally or vertically — we did it! What required extensive XML boilerplate is now handled in just a few lines of code. What to complain about?
Let’s make this example more complicated. Let’s imagine that we need to change how we display the carousel. Now, instead of presenting its items in a row, we want all of them on our screen in a grid.</p>

<p><img src="https://cdn-images-1.medium.com/max/1600/1*TpNkK85lOldeTn9j4IiE7A.png" width="200" alt="Screenshot of Paramount+ application with grid carousel" style="display: block; margin: auto;" /></p>

<p>So, it’s just a simple UI change — it shouldn’t be that hard, right? Instead of a <code class="language-plaintext highlighter-rouge">LazyRow,</code> we need to use a <code class="language-plaintext highlighter-rouge">LazyVerticalGrid,</code> and we should be fine.</p>
<div class="language-plaintext highlighter-rouge"><div class="highlight"><pre class="highlight"><code>LazyColumn {
    items(carousels) { carousel -&gt;
         Column {
             Title(carousel.title)
             Spacer(…)
             LazyVerticalGrid(…) {
                 items(carousel.items) { item -&gt;
                     Poster(item)
                 }
             }
         }
     }
}
</code></pre></div></div>
<p>The code also looks nice, except for the fact that it doesn’t work. When we open the screen, we’re getting an exception thrown at us:</p>
<blockquote>
  <p>java.lang.IllegalStateException: Vertically scrollable component was measured with an infinity maximum height constraints, which is disallowed. One of the common reasons is nesting layouts like LazyColumn and Column(Modifier.verticalScroll()). If you want to add a header before the list of items please add a header as a separate item() before the main items() inside the LazyColumn scope. There are could be other reasons for this to happen: your ComposeView was added into a LinearLayout with some weight, you applied Modifier.wrapContentSize(unbounded = true) or wrote a custom layout. Please try to remove the source of infinite constraints in the hierarchy above the scrolling container.</p>
</blockquote>

<p>Due to the length of the message, even reading it is quite challenging. But at least it’s expressive and provides a solution—so that’s good, right? Well, not exactly. This isn’t surprising, though, as <a href="https://developer.android.com/develop/ui/compose/lists#avoid-nesting-scrollable">Google had already warned us</a> about it.</p>
<blockquote>
  <p>Avoid nesting components scrollable in the same direction</p>
</blockquote>

<p>In the link above, there’s more about this topic, and the solution proposed by the exception message is explained in detail. The problem is it doesn’t work with our problem. They’re saying that instead of nesting scrollable columns inside each other, we should aim at only one nesting level. So, instead of having:</p>

<div class="language-plaintext highlighter-rouge"><div class="highlight"><pre class="highlight"><code>Column(Modifier.verticalScroll(…)) {
    Header()
    LazyColumn {
        items(contentItems) {
            Item(it)
        }
    }
    Footer()
}
</code></pre></div></div>
<p>We should have something like this:</p>
<div class="language-plaintext highlighter-rouge"><div class="highlight"><pre class="highlight"><code>LazyColumn {
    item { Header() }
    items(contentItems) {
        Item(it)
    }
    item { Footer() }
}
</code></pre></div></div>
<p>It makes perfect sense for such a simple use case but in our case… We’re paging the carousels data, and based on the data inside of paged carousels, we’re displaying other paged items. So, in our case, the code would look like this:</p>
<div class="language-plaintext highlighter-rouge"><div class="highlight"><pre class="highlight"><code>LazyColumn {
    items(carousels) { carousel -&gt;
        Column {
            Title(carousel.title)
            Spacer(…)
            items(carousel.items) { item -&gt;
                Poster(item)
            }
        }
    }
}
</code></pre></div></div>
<p>If there’s a red light in your head that is alarming you about using items nested inside of items, your intuition is correct. This code will compile. It will launch. Moreover, it may even look like it’s working until you start to scroll. That is when everything goes wrong, and your app becomes unresponsive and crashes with a beautiful Application Not Responding error.
This solution won’t work for us. Perhaps we should consider how we could have solved that issue in legacy XML. There, we had <code class="language-plaintext highlighter-rouge">NestedScrollView</code>, which could host <code class="language-plaintext highlighter-rouge">RecyclerView</code>, and could handle scrolling for us. Another option would be to use a single <code class="language-plaintext highlighter-rouge">RecyclerView</code> with several adapters chained one after another, using <code class="language-plaintext highlighter-rouge">ConcatAdapter</code>. So, a single <code class="language-plaintext highlighter-rouge">RecyclerView</code> could have multiple adapters that load their items as we scroll. That sounds exactly what we want to achieve here, making it worth porting to the Compose world.
Our main Composable would be a <code class="language-plaintext highlighter-rouge">LazyVerticalGrid</code>, inside which we’d display multiple grids with items. For example, we could have a grid, where a span is used to place a title, followed by carousel items. Implementation would look something like this:</p>
<div class="language-plaintext highlighter-rouge"><div class="highlight"><pre class="highlight"><code>LazyVerticalGrid(…) {
    items(
        items = carousels,
        span = GridItemSpan(x),
    ) { carousel -&gt;
        Title()
        items(carousel.items) { poster -&gt;
            Item(poster)
        }
    }
}
</code></pre></div></div>
<p>And we’re back at the place that we’ve already been before. We’re calling items inside of items, which Compose doesn’t like (but it won’t tell you until runtime). In other words - this approach also won’t work for us.
So here we are, left with a design that is simple yet seems out of our reach. But whatever you do, don’t mention that to the design team. We’d rather not endure another round of their “hilarious” Android jokes. Luckily, we still have a few tricks up our sleeve.
Let’s read the exception message that left an ugly bruise on our software developer pride: “Vertically scrollable component was measured with an infinity maximum height constraints, which is disallowed”. So, an infinity maximum height constraint is what causes the problem. We do know how to change height constraints, don’t we? There’s a <code class="language-plaintext highlighter-rouge">Modifier.height(...)</code>, which can be used to set the height of our composable. Even AI assistants (regardless of the brand) suggest this solution, reinforcing its validity. That must be the right path! Let’s try it then:</p>
<div class="language-plaintext highlighter-rouge"><div class="highlight"><pre class="highlight"><code>LazyColumn {
    items(carousels) { carousel -&gt;
        Column {
            Title(carousel.title)
            Spacer(…)
            LazyVerticalGrid(
                …,
                modifier = Modifier.height(99999999.dp),
            ) {
                items(carousel.items) { item -&gt;
                    Poster(item)
                }
            }
        }
    }
}
</code></pre></div></div>
<p>The <code class="language-plaintext highlighter-rouge">99999999.dp</code> value is picked arbitrarily, and it is smaller than infinity, so it should be good, right? Now our inner grid will take <code class="language-plaintext highlighter-rouge">99999999.dp</code>, and we will be able to place it inside of our LazyColumn. After running this code, surprise, surprise, we’re getting another exception:</p>
<blockquote>
  <p>java.lang.IllegalArgumentException: Can’t represent width of 0 and height of 13312499 in Constraints</p>
</blockquote>

<p>At least it’s different from before. Right now, Compose is complaining that the height is too big to render on screen. We could try with smaller values, but we won’t find a value that would work on every device, especially since those limits may differ depending on the device on which we’re running our app. Even if we find an acceptable height, say <code class="language-plaintext highlighter-rouge">5000.dp</code>, we have more problems to face.</p>
<ol>
  <li>Our grid would always be <code class="language-plaintext highlighter-rouge">5000.dp</code> high, even if there’s just one item inside. So, the grids below would be hard for the user to reach, as they might not fit on the same screen, creating an illusion of only one carousel available.</li>
</ol>

<p><img src="https://cdn-images-1.medium.com/max/1600/1*aZrF1QQOBa3FHOTFv7XgYA.png" width="200" alt="Image presenting grids that take more height than they need" style="display: block; margin: auto;" /></p>

<ol>
  <li>Even such a huge height might not be enough to fit all our items. If we have enough items to fill the entire height, they will eventually become cut off, and we’ll be back at square one.</li>
</ol>

<p><img src="https://cdn-images-1.medium.com/max/1600/1*tJveX4goqJYPg2UBwT3apw.png" width="200" alt="Image presenting grids that need more height than we gave them" style="display: block; margin: auto;" /></p>

<ol>
  <li>The grid’s laziness is broken, as even if there’s only 1 row visible, we will keep items fitting that <code class="language-plaintext highlighter-rouge">5000.dp</code> in our composition. That might be too much for a smooth user experience.</li>
  <li>We want to support paging, so hardcoding height like that wouldn’t really work well. We would load more pages until we reached that <code class="language-plaintext highlighter-rouge">5000.dp</code> height or load all items, which is against the whole idea of paging.</li>
</ol>

<p><img src="https://cdn-images-1.medium.com/max/1600/1*crWD1qcNqQHrfUPQgNs5wg.png" width="200" alt="Screenshot from Charles showing multiple requests to the same paged endpoint" style="display: block; margin: auto;" /></p>

<p>Are we doomed? Not necessarily. Fortunately, there’s one more thing that we could do. Amongst many modifiers that we can use, there’s one that can save us here. <code class="language-plaintext highlighter-rouge">Modifier.heightIn</code>. This modifier accepts two optional parameters - min and max – allowing us to set height limits for our grid, preventing it from extending beyond a predefined value. Let’s try to use it with some predefined max value, like <code class="language-plaintext highlighter-rouge">5000.dp</code>:</p>
<div class="language-plaintext highlighter-rouge"><div class="highlight"><pre class="highlight"><code>LazyColumn {
    items(carousels) { carousel -&gt;
        Column {
            Title(carousel.title)
            Spacer(…)
            LazyVerticalGrid(
                …,
                modifier = Modifier.heightIn(max = 5000.dp),
            ) {
                items(carousel.items) { item -&gt;
                    Poster(item)
                }
            }
        }
    }
}
</code></pre></div></div>
<p>Now our inner grids will take as much height as they need, but not more than <code class="language-plaintext highlighter-rouge">5000.dp</code>. This solution eliminates the problem of huge gaps between grids because if the grid needs just <code class="language-plaintext highlighter-rouge">10.dp</code> - it will take no more than that. The compiler will also be happy because we removed two scrollable containers with infinite height. But we’re still having the problem with:</p>
<ul>
  <li>broken paging,</li>
  <li>possibility that this value is too big not to crush the app,</li>
  <li>the cut-off, when our items take so much space that our limit is too small.</li>
</ul>

<p><img src="https://cdn-images-1.medium.com/max/1600/1*eM3Dc-2ZPI7z0OUDm0pTGA.png" width="200" alt="Image presenting grids with applied heightIn(max = x.dp) modifier" style="display: block; margin: auto;" /></p>

<p>Yet, there’s one safe value that can be rendered, and with some additional logic, we could use it to solve our problem. That value is a viewport height. In fact, if we think about it, that’s what the user will ever see. In case we have just one grid with many items, the user can only see as many as fit on the screen. But that requires additional logic, as we would scroll the lazy column, and our grid wouldn’t scroll.</p>

<p>Scrolling the LazyColumn:</p>

<p><img src="https://cdn-images-1.medium.com/max/1600/1*l6Ut_pqYnXQ1HWCRoUNAoQ.gif" width="200" alt="Gif presenting how scrolling of LazyColumn would look like" style="display: block; margin: auto;" /></p>

<p>Scrolling the LazyVerticalGrid:</p>

<p><img src="https://cdn-images-1.medium.com/max/1600/1*0GKHIJFzKc2u0tUllV3Y9A.gif" width="200" alt="Gif presenting how scrolling of LazyVerticalGrid would look like" style="display: block; margin: auto;" /></p>

<p>However, if we modified the behavior of our scrollables in such a way that we’re scrolling only the one that we need to scroll and not the other one, we could implement the desired behavior. Let me explain it. Let’s say that we have a <code class="language-plaintext highlighter-rouge">LazyColumn</code> with three grids. 1st grid has 1 row of items, 2nd and 3rd have 10 rows each. Let’s assume that we can fit on a single screen only 6 rows. We’re limiting each grid’s height to the maximum viewport height. So initially, we’re seeing on our screen the entire first grid and five rows of 2nd grid. Now we should intercept any scroll events to the <code class="language-plaintext highlighter-rouge">LazyColumn</code> or the visible grids so that we’re scrolling the <code class="language-plaintext highlighter-rouge">LazyColumn</code>, not its children. 1st grid cannot be scrolled either way, and in the case of 2nd grid, we don’t want it to scroll yet, as it would mean that we would still see 1st grid’s items, and we could scroll away from the 1st row of 2nd grid. Instead, we want to scroll <code class="language-plaintext highlighter-rouge">LazyColumn</code> until the 2nd grid is the only one visible to the user. The gif below represents this phase. The red border shows the area visible to the user; everything outside of it is what is happening under the hood.</p>

<p><img src="https://cdn-images-1.medium.com/max/1600/1*rBLSuy-Wt67OxxROzmWuOg.gif" width="200" alt="Gif representing the idea of scrolling LazyColumn until second grid is the only one visible" style="display: block; margin: auto;" /></p>

<p>When <code class="language-plaintext highlighter-rouge">LazyVerticalGrid</code> fills the entire viewport of <code class="language-plaintext highlighter-rouge">LazyColumn</code>, we want to dispatch all scroll events to it. So now, for as long as the second grid can be scrolled forward, we’re scrolling it.</p>

<p><img src="https://cdn-images-1.medium.com/max/1600/1*ZIM59QXwboKnfXvoUVdCyQ.gif" width="200" alt="Gif representing the idea of scrolling LazyVerticalGrid as long as it can be scrolled" style="display: block; margin: auto;" /></p>

<p>Finally, when we get to the point where it can’t be scrolled anymore, we’re again dispatching scroll events to the <code class="language-plaintext highlighter-rouge">LazyColumn</code>, so that only the 3rd grid becomes visible. Then we’re dispatching scroll events to the 3rd grid for as long as we can scroll it. And the same logic applies to upward scrolling.</p>

<p><img src="https://cdn-images-1.medium.com/max/1600/1*ngqxkEKmoHX01YBhl7uiLA.gif" width="200" alt="Gif representing the idea of scrolling LazyColumn as long as 3rd grid is the only one visible" style="display: block; margin: auto;" /></p>

<p>Fortunately, Jetpack Compose has a modifier, which can do that. It’s <code class="language-plaintext highlighter-rouge">Modifier.nestedScroll</code>. It allows us to register a listener that takes part in <a href="https://developer.android.com/develop/ui/compose/touch-input/pointer-input/scroll#nestedscroll-modifier">nested scrolling</a>. Google has excellent documentation about that, so I’ll send you there to get more details. What is important for us is that we can add this modifier to any composable in the hierarchy, and it will participate in the nested scrolling cycle of all its children. Whenever a child is scrolled, we will receive that scroll offset. Then we can decide how much of the offset we want to consume. The originator of the scroll event will handle the unconsumed offset. Unfortunately, we cannot identify which Composable was the one that was scrolled, but we can work without it. We want to consume the entire offset and manage which child will be scrolled with it. The usage of this modifier looks like that:</p>
<div class="language-plaintext highlighter-rouge"><div class="highlight"><pre class="highlight"><code>val nestedScrollConnection = object : NestedScrollConnection {
    override fun onPreScroll(available: Offset, source: NestedScrollSource): Offset {
        return super.onPreScroll(available, source)
    }

    override fun onPostScroll(
        consumed: Offset,
        available: Offset,
        source: NestedScrollSource
    ): Offset {
        return super.onPostScroll(consumed, available, source)
    }

    override suspend fun onPreFling(available: Velocity): Velocity {
        return super.onPreFling(available)
    }

    override suspend fun onPostFling(consumed: Velocity, available: Velocity): Velocity {
        return super.onPostFling(consumed, available)
    }
}
LazyColumn(modifier = Modifier.nestedScroll(nestedScrollConnection)) {
    ...
}
</code></pre></div></div>
<p>We have several ways of intercepting the scroll offset. What is important for our case is <code class="language-plaintext highlighter-rouge">onPreScroll</code>. From there, we’ll determine which container is scrolling. But how can we tell a column/grid to scroll?
Each Lazy container has a state we can use as a handle. For <code class="language-plaintext highlighter-rouge">LazyRow</code> and <code class="language-plaintext highlighter-rouge">LazyColumn</code> it is <code class="language-plaintext highlighter-rouge">LazyListState.</code> For <code class="language-plaintext highlighter-rouge">LazyVerticalGrid</code>/<code class="language-plaintext highlighter-rouge">LazyHorizontalGrid</code> it is <code class="language-plaintext highlighter-rouge">LazyGridState</code>. Each state implements the <code class="language-plaintext highlighter-rouge">ScrollableState</code> interface, which has a <code class="language-plaintext highlighter-rouge">dispatchRawData</code> method, which allows us to scroll the container in such a way that this offset is not passed to the nested scroll connection; hence, it allows us to avoid a case where we’re handling the same offset again and again. If we use standard scrollBy API, that offset would be sent back to our nested scroll connection to be processed repeatedly. A very simplified solution could look like this:</p>
<div class="language-plaintext highlighter-rouge"><div class="highlight"><pre class="highlight"><code>val lazyColumnState = rememberLazyListState()
val lazyGridStates = remember { List(3) { LazyGridState() } }
val nestedScrollConnection = object : NestedScrollConnection {
    override fun onPreScroll(available: Offset, source: NestedScrollSource): Offset {
        when (determineWhichToScroll()) {
            ContainerToScroll.Column -&gt; lazyColumnState.dispatchRawDelta(available.y)
            ContainerToScroll.Grid0 -&gt; lazyGridStates[0].dispatchRawDelta(available.y)
            ContainerToScroll.Grid1 -&gt; lazyGridStates[1].dispatchRawDelta(available.y)
            ContainerToScroll.Grid2 -&gt; lazyGridStates[2].dispatchRawDelta(available.y)
        }
        return available
    }
}
LazyColumn(
    modifier = Modifier.nestedScroll(nestedScrollConnection),
    state = lazyColumnState,
) {
    item {
        LazyVerticalGrid(
            state = lazyGridStates[0],
            columns = GridCells.Fixed(3),
        ) {
            items(carouselItems) { Poster(it) }
        }
    }
    item {
        LazyVerticalGrid(
            state = lazyGridStates[1],
            columns = GridCells.Fixed(3),
        ) {
            items(carouselItems) { Poster(it) }
        }
    }
    item {
        LazyVerticalGrid(
            state = lazyGridStates[2],
            columns = GridCells.Fixed(3),
        ) {
            items(carouselItems) { Poster(it) }
        }
    }
}
</code></pre></div></div>
<p>Of course, the code above has several problems. We should remember the <code class="language-plaintext highlighter-rouge">CarouselsColumnConnection,</code> not recreate it over and over. We have hardcoded 3 Grid carousels, whereas our complete solution needs to handle various amounts of Grids. The logic determining which container to scroll is also skipped in the code above. But most importantly it would be too easy to scroll it like that. We have several grids that take the height of the entire viewport, so we need to ensure that when the user scrolls quickly, we don’t pass the entire offset to the column. We need to pass an amount that is enough to make the grid displayed at the top, and the rest of the offset should be passed to the grid. There might be an edge case: after scrolling the column and grid, we will have to scroll again, as the grid is no longer scrollable in that direction.
The code below contains the complete <code class="language-plaintext highlighter-rouge">NestedScrollConnection</code> code, which might be a bit overwhelming.</p>
<div class="language-plaintext highlighter-rouge"><div class="highlight"><pre class="highlight"><code>class NestedVerticalGridsScrollConnection(
    private val lazyColumnState: LazyListState,
    private val innerScrollableStates: List&lt;ScrollableState&gt;,
) : NestedScrollConnection {

    override fun onPreScroll(
        available: Offset,
        source: NestedScrollSource,
    ): Offset {
        if (available.y == 0f) {
            return Offset.Zero
        }
        val isScrollingDown = available.y &lt; 0
        var offsetToProcess = abs(available.y)
        while (offsetToProcess != 0f) {
            if (lazyColumnState.hasReachedScrollBoundary(isScrollingDown)) {
                // LazyColumn can not scroll anymore.
                // Don't consume offset, to display overscroll effect.
                return Offset.Zero
            }
            when (val gridScrollData = buildScrollData(isScrollingDown)) {
                ScrollData.NoVerticalScrollable -&gt; {
                    return Offset.Zero
                }

                is ScrollData.VerticalScrollData -&gt; {
                    offsetToProcess -= processOffset(
                        offset = offsetToProcess,
                        isScrollingDown = isScrollingDown,
                        scrollData = gridScrollData,
                    )
                }
            }
        }
        return available
    }

    private fun buildScrollData(isScrollingDown: Boolean): ScrollData {
        val verticalScrollables = lazyColumnState.layoutInfo.visibleItemsInfo.filter {
            innerScrollableStates[it.index]?.isVertical() == true
        }
        if (verticalScrollables.isEmpty()) return ScrollData.NoVerticalScrollable

        val scrollableToCheck = if (isScrollingDown) {
            verticalScrollables.last()
        } else {
            verticalScrollables.first()
        }
        val lazyState = innerScrollableStates[scrollableToCheck.index]!!

        val canScroll = if (isScrollingDown) {
            lazyState.canScrollForward
        } else {
            lazyState.canScrollBackward
        }

        val scrollableStartOffset = scrollableToCheck.offset
        val scrollBoundaryOffset = if (isScrollingDown) {
            -lazyColumnState.layoutInfo.beforeContentPadding - lazyColumnState.layoutInfo.afterContentPadding
        } else {
            0
        }
        val desiredOffset =
            if (!canScroll &amp;&amp; scrollableStartOffset == -lazyColumnState.layoutInfo.beforeContentPadding) {
                scrollBoundaryOffset
            } else {
                -lazyColumnState.layoutInfo.beforeContentPadding
            }

        return ScrollData.VerticalScrollData(
            visibleVerticalItemsCount = lazyColumnState.layoutInfo.visibleItemsInfo.size,
            scrollableState = lazyState,
            diffBetweenDesiredAndCurrentOffset = abs(desiredOffset - scrollableStartOffset).toFloat(),
            isAtDesiredOffsetAndCanBeScrolled = scrollableStartOffset == desiredOffset &amp;&amp; canScroll,
        )
    }

    private fun processOffset(
        offset: Float,
        isScrollingDown: Boolean,
        scrollData: ScrollData.VerticalScrollData,
    ): Float {
        return when {
            scrollData.visibleVerticalItemsCount &gt; 1 -&gt; {
                scrollColumn(
                    offset = offset,
                    isScrollingDown = isScrollingDown,
                    withLimit = scrollData.diffBetweenDesiredAndCurrentOffset,
                )
            }

            scrollData.isAtDesiredOffsetAndCanBeScrolled -&gt; {
                scrollInnerScrollable(
                    offset = offset,
                    scrollableState = scrollData.scrollableState,
                    isScrollingDown = isScrollingDown,
                )
            }

            else -&gt; {
                val limit = if (scrollData.diffBetweenDesiredAndCurrentOffset == 0f) {
                    lazyColumnState.layoutInfo.mainAxisItemSpacing.coerceAtLeast(1).toFloat()
                } else {
                    scrollData.diffBetweenDesiredAndCurrentOffset
                }
                scrollColumn(
                    offset = offset,
                    isScrollingDown = isScrollingDown,
                    withLimit = limit,
                )
            }
        }
    }

    private fun scrollColumn(
        offset: Float,
        isScrollingDown: Boolean,
        withLimit: Float = Float.MAX_VALUE,
    ): Float {
        val toConsume = min(offset, withLimit)
        return if (isScrollingDown) {
            lazyColumnState.dispatchRawDelta(toConsume)
        } else {
            -lazyColumnState.dispatchRawDelta(-toConsume)
        }
    }

    private fun scrollInnerScrollable(
        offset: Float,
        scrollableState: ScrollableState,
        isScrollingDown: Boolean,
    ): Float {
        return if (isScrollingDown) {
            scrollableState.dispatchRawDelta(offset)
        } else {
            -scrollableState.dispatchRawDelta(-offset)
        }
    }

    private fun LazyListState.hasReachedScrollBoundary(isScrollingDown: Boolean): Boolean {
        return if (isScrollingDown) {
            val endOffset = layoutInfo.viewportSize.height - layoutInfo.beforeContentPadding
            !canScrollForward &amp;&amp; layoutInfo.viewportEndOffset == endOffset
        } else {
            !canScrollBackward &amp;&amp; layoutInfo.viewportStartOffset == -layoutInfo.beforeContentPadding
        }
    }

    private sealed interface ScrollData {

        data object NoVerticalScrollable : ScrollData

        data class VerticalScrollData(
            val visibleVerticalItemsCount: Int,
            val scrollableState: ScrollableState,
            val diffBetweenDesiredAndCurrentOffset: Float,
            val isAtDesiredOffsetAndCanBeScrolled: Boolean,
        ) : ScrollData
    }
}
</code></pre></div></div>
<p>There’s one more problem now - how to pass scroll states of <code class="language-plaintext highlighter-rouge">LazyVerticalGrid</code>s that are created dynamically - in the end we’re paging carousels too. That part is easier than it seems to be. We can create a class that will hold and create <code class="language-plaintext highlighter-rouge">LazyGridState</code>s whenever it is asked for one.</p>
<div class="language-plaintext highlighter-rouge"><div class="highlight"><pre class="highlight"><code>class InnerScrollablesState {
    private val _gridStates: MutableList&lt;ScrollableState&gt; = mutableMapOf()
    val gridStates: List&lt;ScrollableState&gt; = _gridStates

    fun getOrCreateStateForGrid(carouselIndex: Int): LazyGridState {
        val scrollableState = _gridStates[carouselIndex]
        return if (scrollableState != null) {
            scrollableState as LazyGridState
        } else {
            LazyGridState().also {
                _gridStates.add(it)
            }
        }
    }

    fun clearState() {
        _gridStates.clear()
    }
}
</code></pre></div></div>
<p>Now, we can quite easily create new <code class="language-plaintext highlighter-rouge">LazyGridState</code>s and have access to the list of all <code class="language-plaintext highlighter-rouge">ScrollableState</code>s from our <code class="language-plaintext highlighter-rouge">NestedVerticalGridsScrollConnection</code>.</p>
<div class="language-plaintext highlighter-rouge"><div class="highlight"><pre class="highlight"><code>val lazyColumnState = rememberLazyListState()
val innerScrollablesState = remember { InnerScrollablesState() }
val nestedScrollConnection = remember {
    NestedVerticalGridsScrollConnection(
        lazyColumnState,
        innerScrollablesState.gridStates,
    )
}
val viewportHeight = with(LocalDensity.current) {
    lazyColumnState.layoutInfo.viewportSize.height.toDp()
}
LazyColumn(
    modifier = Modifier.nestedScroll(nestedScrollConnection),
    state = lazyColumnState,
) {
    itemsIndexed(carousels) { index, carousel -&gt;
        LazyVerticalGrid(
            state = innerScrollablesState.getOrCreateStateForGrid(index),
            columns = GridCells.Fixed(3),
            modifier = Modifier.heightIn(max = viewportHeight),
        ) {
            items(carousel.items) { Poster(it) }
        }
    }
}
</code></pre></div></div>

<p>Finally, we have a solution that is working! But… Yes, there’s a “but”… It still has some limitations. For example, imagine we have a paging data source that doesn’t support placeholders. In that case, we might end up in such a situation where we’ve scrolled to the end of the inner grid, scrolled the lazy column to the middle, and then suddenly, our grid becomes larger as more items are loaded. With placeholders, such a scenario wouldn’t appear, as we would have to scroll over the placeholders - in that scenario, the worst that can happen would be to display more placeholders than items that we have in a dataset. That would mean that our grid could become smaller than it was with placeholders in place.
Another limitation is how this code behaves on Android TV. Since Google deprecated <code class="language-plaintext highlighter-rouge">TvLazy*</code> containers, we should be able to reuse this code on Android TV. We can do it, but there’s another problem with scrolling when moving focus inside a grid… It’s related to <code class="language-plaintext highlighter-rouge">LocalBringIntoViewSpec,</code> which gets nested, and now we need to handle it somehow. But that’s something that must be covered in a separate article :) Here, you can see how the problem is manifests on the Search screen in the Paramount+ app. The grid scrolls to the top after focusing on the last row item, even though no one requested it.</p>

<p><img src="https://cdn-images-1.medium.com/max/1600/1*Qa0SI9aPgnxyoE4ojKUwZQ.gif" width="600" alt="Gif presenting issue on Android TV" style="display: block; margin: auto;" /></p>

<p>Thank you for staying with me and enjoy your journey with Compose!</p>]]></content><author><name>Karol Ksionek</name></author><category term="blog" /><summary type="html"><![CDATA[Jetpack Compose and Nested Scrolling]]></summary></entry><entry><title type="html">How to sniff HTTPS traffic without certificate manipulation?</title><link href="https://paramount.tech/blog/2024/12/09/sniff-https-traffic-without-certificate-manipulation.html" rel="alternate" type="text/html" title="How to sniff HTTPS traffic without certificate manipulation?" /><published>2024-12-09T00:00:00+00:00</published><updated>2024-12-09T00:00:00+00:00</updated><id>https://paramount.tech/blog/2024/12/09/sniff-https-traffic-without-certificate-manipulation</id><content type="html" xml:base="https://paramount.tech/blog/2024/12/09/sniff-https-traffic-without-certificate-manipulation.html"><![CDATA[<h2 id="introduction">Introduction</h2>

<p>Recently, I was working with a third-party SDK written in Python. I had to find out which headers this SDK sends to the server.
I could have used dedicated software like <code class="language-plaintext highlighter-rouge">Charles</code> or <code class="language-plaintext highlighter-rouge">mimproxy</code>, but I didn’t have much experience with manipulating certificates in Python,
and someone else used SDK directly.
Instead, I came up with something simpler.</p>

<h2 id="the-solution">The solution</h2>

<p>Let’s say I have an SDK that sends requests to <code class="language-plaintext highlighter-rouge">https://www.example.com</code>.
I can configure the SDK’s base URL.</p>

<p>I start with running <a href="https://ngrok.com/">ngrok</a> - a reverse proxy that creates a secure tunnel to localhost:</p>

<div class="language-shell highlighter-rouge"><div class="highlight"><pre class="highlight"><code>ngrok http 8090
</code></pre></div></div>

<p>This script starts a tunnel that is publicly accessible through HTTPS, it points to my local machine on port 8090.
The URL looks somewhat like: https://b2a1-93-174-30-35.ngrok-free.app</p>

<p>I pass this URL to the SDK.</p>

<p>Then I start <a href="https://spring.io/projects/spring-cloud-gateway">Spring Cloud Gateway</a> with the following configuration:</p>

<div class="language-yaml highlighter-rouge"><div class="highlight"><pre class="highlight"><code><span class="na">spring</span><span class="pi">:</span>
  <span class="na">cloud</span><span class="pi">:</span>
    <span class="na">gateway</span><span class="pi">:</span>
      <span class="na">routes</span><span class="pi">:</span>
        <span class="pi">-</span> <span class="na">id</span><span class="pi">:</span> <span class="s">all</span>
          <span class="na">uri</span><span class="pi">:</span> <span class="s">https://www.example.com</span>
          <span class="na">predicates</span><span class="pi">:</span>
            <span class="pi">-</span> <span class="s">Path=/**</span>
<span class="na">server</span><span class="pi">:</span>
  <span class="na">port</span><span class="pi">:</span> <span class="m">8090</span>
</code></pre></div></div>

<p>This configuration starts server on port 8090 and forwards all incoming requests to <code class="language-plaintext highlighter-rouge">https://www.example.com</code>.</p>

<p>Then it’s possible to view requests and responses in the <code class="language-plaintext highlighter-rouge">ngrok</code> dashboard - http://127.0.0.1:4040/</p>

<figure class="image-with-caption">
  <img src="/blog/img/sniff-https-traffic-without-certificate-manipulation/ngrok_dashboard.png" alt="ngrok dashboard" />
  <figcaption></figcaption>
</figure>

<p>The following diagram shows how the traffic is sniffed:</p>

<p><img src="http://www.plantuml.com/plantuml/proxy?cache=no&amp;fmt=svg&amp;src=https://raw.githubusercontent.com/kkocel/sniff-traffic-using-ngrok-and-spring-cloud-gateway/main/docs/sniffing-sequence.puml" alt="Request path" /></p>

<h2 id="conclusion">Conclusion</h2>

<p>In this article, I showed how to sniff HTTPS traffic without manipulating certificates.
So, if you don’t want or can’t manipulate certificates (but you can change the base URL), it can be a solution for you.
The source code can be found on <a href="https://github.com/kkocel/sniff-traffic-using-ngrok-and-spring-cloud-gateway">GitHub</a>.</p>]]></content><author><name>Krzysztof Kocel</name></author><category term="blog" /><summary type="html"><![CDATA[Introduction]]></summary></entry><entry><title type="html">Signing HTTP requests to AWS using WebClient</title><link href="https://paramount.tech/blog/2024/11/29/signed-requests-to-aws-in-webclient.html" rel="alternate" type="text/html" title="Signing HTTP requests to AWS using WebClient" /><published>2024-11-29T00:00:00+00:00</published><updated>2024-11-29T00:00:00+00:00</updated><id>https://paramount.tech/blog/2024/11/29/signed-requests-to-aws-in-webclient</id><content type="html" xml:base="https://paramount.tech/blog/2024/11/29/signed-requests-to-aws-in-webclient.html"><![CDATA[<p>Recently, I had to communicate with OpenSearch hosted on AWS from my reactive Spring Boot application.</p>

<p>It turned out that <a href="https://github.com/opensearch-project/opensearch-java">Java client for OpenSearch</a> exists,
but does not support reactive mode.
The same goes for <a href="https://github.com/opensearch-project/spring-data-opensearch">Spring Data for OpenSearch</a>.</p>

<p>So, instead of relying on the above libraries, I used raw WebClient and manually signed HTTP requests.</p>

<p>After reading <a href="https://docs.aws.amazon.com/IAM/latest/UserGuide/create-signed-request.html">how to create a signed request</a>
I realized that the request payload needs to be used in signing as well - not an easy task in a reactive world ;).</p>

<p>I could encode JSON as a string and sign the request with the payload known beforehand, but that would be a workaround.
I found <a href="https://andrew-flower.com/blog/Custom-HMAC-Auth-with-Spring-WebClient#s-post-data-signing">this article</a>
and adapted it for signing AWS requests.</p>

<p>Signing requests with the body is more complex in the Reactor world.
It’s because the body is only available once it gets encoded.</p>

<p>Here is a high-level diagram showing the three main steps:
<img src="http://www.plantuml.com/plantuml/proxy?cache=no&amp;fmt=svg&amp;src=https://raw.githubusercontent.com/kkocel/webclient-signed-request-to-aws/main/docs/web-client-signing-sequence.puml" alt="High-level workflow" /></p>

<ol>
  <li><code class="language-plaintext highlighter-rouge">MessageSigningHttpConnector</code> exposes the request to the server, so I store it in the Reactor <code class="language-plaintext highlighter-rouge">Context</code>.</li>
  <li><code class="language-plaintext highlighter-rouge">BodyProvidingJsonEncoder</code> encodes the request body, so I extract it from the <code class="language-plaintext highlighter-rouge">DataBuffer</code> and add it as part of the signature.</li>
  <li>After generating the signature, I add it to the request headers.</li>
</ol>

<p>Phew! That was a lot of work!</p>

<p>The proposed solution works for JSON requests only but can be extended to other protocols.
Just reuse <code class="language-plaintext highlighter-rouge">BodyProvidingEncoder</code>, and register your encoder in the <code class="language-plaintext highlighter-rouge">ClientCodecConfigurer</code>.</p>

<p>If this solution is helpful to you, the source code is on <a href="https://github.com/kkocel/webclient-signed-request-to-aws">GitHub</a>.</p>]]></content><author><name>Krzysztof Kocel</name></author><category term="blog" /><summary type="html"><![CDATA[Recently, I had to communicate with OpenSearch hosted on AWS from my reactive Spring Boot application.]]></summary></entry><entry><title type="html">What can Voice Assistants teach us?</title><link href="https://paramount.tech/blog/2024/01/26/what-can-voice-assistants-teach-us.html" rel="alternate" type="text/html" title="What can Voice Assistants teach us?" /><published>2024-01-26T00:00:00+00:00</published><updated>2024-01-26T00:00:00+00:00</updated><id>https://paramount.tech/blog/2024/01/26/what-can-voice-assistants-teach-us</id><content type="html" xml:base="https://paramount.tech/blog/2024/01/26/what-can-voice-assistants-teach-us.html"><![CDATA[<h2 id="introduction">Introduction</h2>

<p>Recently, voice-activated virtual assistants like Amazon’s Alexa have gained significant popularity,
promising a world of possibilities for developers and businesses. My team have been exploring the topic since
2020 with various results. We have successfully released multiple applications, some of which were popular and widely used.
However, after careful consideration, our team stopped its efforts to develop skills for Alexa devices.
This decision was not taken lightly and was based on several key factors that made us reevaluate our strategy.
In this article, we will explore things we learned and highlight the positive aspects of our journey.</p>

<h2 id="what-are-the-positives">What are the positives?</h2>
<p>First of all, working on voice assistant applications was a challenging yet very satisfying time.
There were many positive aspects that have enriched our job, and I will introduce the most prominent ones below.</p>

<h4 id="greenfield-projects">Greenfield Projects</h4>
<p>Developing Alexa skills allowed us to innovate and explore cutting-edge technologies.
We embraced functional and reactive programming paradigms, delved into serverless architectures, and leveraged other
state-of-the-art solutions to create impactful applications. The challenges we faced also sparked creativity
and ingenuity, leading to the development of novel solutions and approaches.</p>

<h4 id="participation-in-betas">Participation in Betas</h4>
<p>Participating in beta programs facilitated by Amazon’s dedicated developer team allowed us to stay ahead of the curve
in the voice technology landscape. This early access enabled us to showcase our skills globally and stay abreast
of emerging trends and functionalities. Moreover, the feedback received during beta testing empowered us to refine
our applications and tailor them to the needs and preferences of our users.</p>

<h4 id="supportive-amazon-developers">Supportive Amazon Developers</h4>
<p>The supportive ecosystem within the Amazon developer community proved invaluable. Whenever we encountered technical
challenges or sought guidance to enhance our skills, we found a collaborative network ready to assist and share insights,
fostering a culture of continuous improvement. Additionally, the camaraderie within the community provided networking and knowledge exchange opportunities, enriching our professional growth and development.</p>

<h3 id="comprehensive-documentation">Comprehensive Documentation</h3>
<p>Amazon’s Alexa platform provides extensive documentation and resources for developers, making it easier to understand
and utilize the platform’s features and functionalities. This comprehensive documentation streamlines the development process,
enabling developers to quickly grasp the concepts and best practices necessary to create compelling voice applications.</p>

<h3 id="easy-entry-for-developers">Easy Entry for Developers</h3>
<p>One significant advantage of developing for Alexa devices is the streamlined development process. Developers are relieved
of the burden of voice recognition implementation, as this functionality is seamlessly handled on the Alexa side.
This simplification accelerates the development cycle, allowing developers to focus on crafting engaging experiences
without the intricacies of voice recognition. Moreover, by leveraging the existing infrastructure and capabilities
of the Alexa platform, we could expedite the development timeline and deliver high-quality applications to market more
efficiently.</p>

<h3 id="vast-user-base">Vast User Base</h3>
<p>Alexa boasts a vast user base, with millions of devices deployed worldwide. This widespread adoption gives developers 
a vast application audience, offering unparalleled reach and potential for engagement. By targeting
the Alexa platform, developers can tap into this extensive user base and deliver their applications to a global audience,
maximizing their impact and visibility in the market.</p>

<h3 id="diverse-device-ecosystem">Diverse Device Ecosystem</h3>
<p>Alexa’s ecosystem encompasses both audio and video devices, offering developers a diverse range of hardware to target.
This diversity opens up a wealth of possibilities for developers to be creative, catering to different user preferences
and scenarios. Whether developing voice-only experiences for headless devices or leveraging the visual capabilities
of video devices, developers have the flexibility to create immersive and engaging applications that cater to a variety
of user needs and preferences.</p>

<h2 id="conclusion">Conclusion</h2>
<p>In conclusion, while various considerations influenced our decision to pull back from Alexa development,
our journey was full of positive outcomes. We celebrate the learning experiences gained, the innovative solutions
explored, and the supportive developer community encountered along the way. As we navigate the evolving landscape
of technology, we remain open to embracing new opportunities and platforms that align with our business objectives
and user needs, confident in our ability to thrive in the ever-changing digital ecosystem.</p>]]></content><author><name>Przemysław Latoch</name></author><category term="blog" /><summary type="html"><![CDATA[Introduction]]></summary></entry><entry><title type="html">A little more on Spring tests - good practices</title><link href="https://paramount.tech/blog/2023/12/11/a-little-more-on-spring-tests-good-practices.html" rel="alternate" type="text/html" title="A little more on Spring tests - good practices" /><published>2023-12-11T00:00:00+00:00</published><updated>2023-12-11T00:00:00+00:00</updated><id>https://paramount.tech/blog/2023/12/11/a-little-more-on-spring-tests-good-practices</id><content type="html" xml:base="https://paramount.tech/blog/2023/12/11/a-little-more-on-spring-tests-good-practices.html"><![CDATA[<p>Within Paramount+, we recently improved our integration tests and their execution time, especially on CI.</p>

<p>This article provides hints on how to define good level of tests, how to make tests more readable, and how to use some
underlying mechanisms from Spring for easier maintenance.</p>

<p><a href="/blog/2023/12/11/a-little-more-on-spring-tests-our-optimizations.html">In the second article</a>, we’ll show what
optimizations we did for tests and what you might check in your app.</p>

<h2 id="challenging-the-testing-pyramid">Challenging the testing pyramid</h2>

<p>You probably have heard of a testing pyramid, visualizing unit tests as the base of the software, with integration and
E2E tests applied on lower and lower scales.</p>

<p>As in architecture we don’t follow pyramidal shapes anymore, it’s not a surprise the software testing pyramid also got
challenged. One of the articles worth providing here is <a href="https://engineering.atspotify.com/2018/01/testing-of-microservices/"><em>Testing of
Microservices</em></a> by Spotify. There, they propose
the following “honeycomb” (a.k.a. “diamond”) shape, where the majority of tests are the integration ones.</p>

<figure class="image-with-caption">
  <img src="/blog/img/spring-tests/testing.png" alt="Standard pyramid and the honeycomb" />
  <figcaption></figcaption>
</figure>

<p>The above approach makes sense, but there is also another view on this, where people question rather the “unit” part
from the name “unit tests” and define the unit more like a component, e.g.
from <a href="https://c4model.com/">C4 architecture model</a>.
A component can correspond with Java’s <code class="language-plaintext highlighter-rouge">package</code> itself and to see how to divide the app into mid-sized building blocks
and how to test them not to fix yourself on implementation details, but on behaviors, we recommend checking the
following
talks from Jakub Nabrdalik:</p>

<ol>
  <li><a href="https://www.youtube.com/watch?v=KrLFs6f2bOA"><em>Keep IT clean: mid-sized building blocks and hexagonal architecture</em></a></li>
  <li><a href="https://www.youtube.com/watch?v=2vEoL3Irgiw"><em>Improving your Test Driven Development in 45 minutes</em></a></li>
</ol>

<h2 id="the-need-of-integration-tests">The need of integration tests</h2>

<p>As we already know it’s worth thinking about bigger units and integration tests themselves, let’s define where the
border between tests is.
<a href="https://docs.spring.io/spring-framework/reference/testing/integration.html">Spring doc on integration testing</a> states:</p>

<blockquote>
  <p>[Integration Testing] lets you test the correct wiring of your Spring IoC container contexts</p>
</blockquote>

<p>In other words, each time you start Spring context, you have an integration test as Spring is responsible for a proper
“integration” of your dependencies, even if they don’t touch IO.</p>

<p>With such a definition, we can immediately see integration tests can help us to spot the issues un-spottable even with
good component tests, e.g. logic hidden in</p>

<ol>
  <li><code class="language-plaintext highlighter-rouge">@HystrixCommand</code></li>
  <li><code class="language-plaintext highlighter-rouge">@Transactional</code></li>
  <li><code class="language-plaintext highlighter-rouge">@Cacheable</code></li>
  <li><code class="language-plaintext highlighter-rouge">@ConditionalOn...</code></li>
  <li>Filters</li>
  <li>Interceptors</li>
  <li><code class="language-plaintext highlighter-rouge">@PreAuthorize</code></li>
</ol>

<p>Basically, with all Aspect-Oriented Programming, called from time to time “Spring magic”, requiring Spring context and
beans management.</p>

<p>Here, it’s worth mentioning, though, that Spring itself provides many tools for testing and the logic coming
from <code class="language-plaintext highlighter-rouge">@ConditionalOn...</code> can be tested in an unit-like manner (without a real Spring context), just by using
Spring’s <code class="language-plaintext highlighter-rouge">ApplicationContextRunner</code>.</p>

<h2 id="batteries-included---what-tools-are-already-there">Batteries included - what tools are already there</h2>

<p><code class="language-plaintext highlighter-rouge">ApplicationContextRunner</code> is a nice thing, but what else comes when including <code class="language-plaintext highlighter-rouge">spring-boot-starter-test</code>?</p>

<ol>
  <li><code class="language-plaintext highlighter-rouge">spring-boot-test</code>, <code class="language-plaintext highlighter-rouge">spring-test</code> - helpers from Spring, e.g. mentioned <code class="language-plaintext highlighter-rouge">ApplicationContextRunner</code>, <code class="language-plaintext highlighter-rouge">SpringExtension</code></li>
  <li><code class="language-plaintext highlighter-rouge">JUnit</code> (Platform + Jupiter) - tests runner and framework</li>
  <li><code class="language-plaintext highlighter-rouge">Mockito</code> - a tool for mocking. BTW it’s worth checking <code class="language-plaintext highlighter-rouge">MockitoExtension</code> and <code class="language-plaintext highlighter-rouge">BDDMockito</code> which are already there</li>
  <li><code class="language-plaintext highlighter-rouge">AssertJ</code>, <code class="language-plaintext highlighter-rouge">Hamcrest</code> - fluent assertions, so you don’t need to guess anymore order of parameters if
it’s <code class="language-plaintext highlighter-rouge">assertEquals(expected, actual)</code> or <code class="language-plaintext highlighter-rouge">assertEquals(actual, expected)</code> 😉 it’ll be
just <code class="language-plaintext highlighter-rouge">assertThat(actual).isEqualTo(expected)</code> or even <code class="language-plaintext highlighter-rouge">then(actual).isEqualTo(expected)</code> with <code class="language-plaintext highlighter-rouge">BDDAssertions</code>
which are already there</li>
  <li>Things helping to test JSON, XML and others (worth to mention <code class="language-plaintext highlighter-rouge">BasicJsonTester</code> for JSON and <code class="language-plaintext highlighter-rouge">OutputCaptureExtension</code>
for checking log messages)</li>
  <li><code class="language-plaintext highlighter-rouge">Awaitility</code> for active waiting in your tests</li>
</ol>

<h2 id="annotations-meta-annotations-and-their-quirks">Annotations, meta-annotations and their quirks</h2>

<p>Both Spring and JUnit interpret annotation put on annotation as if it was put directly on the class. This means whenever
you see</p>

<div class="language-java highlighter-rouge"><div class="highlight"><pre class="highlight"><code><span class="nd">@SpringBootTest</span>
<span class="nd">@ExtendWith</span><span class="o">(</span><span class="nc">SpringExtension</span><span class="o">.</span><span class="na">class</span><span class="o">)</span>
<span class="kd">class</span> <span class="nc">IntegrationTest</span> <span class="o">{</span>
    <span class="cm">/* ... */</span>
<span class="o">}</span>
</code></pre></div></div>

<p>you can safely remove <code class="language-plaintext highlighter-rouge">@ExtendWith(SpringExtension.class)</code> as <code class="language-plaintext highlighter-rouge">@SpringBootTest</code> itself already adds it (and more):</p>

<div class="language-java highlighter-rouge"><div class="highlight"><pre class="highlight"><code><span class="nd">@Target</span><span class="o">(</span><span class="nc">ElementType</span><span class="o">.</span><span class="na">TYPE</span><span class="o">)</span>
<span class="nd">@Retention</span><span class="o">(</span><span class="nc">RetentionPolicy</span><span class="o">.</span><span class="na">RUNTIME</span><span class="o">)</span>
<span class="nd">@Documented</span>
<span class="nd">@Inherited</span>
<span class="nd">@BootstrapWith</span><span class="o">(</span><span class="nc">SpringBootTestContextBootstrapper</span><span class="o">.</span><span class="na">class</span><span class="o">)</span>
<span class="nd">@ExtendWith</span><span class="o">(</span><span class="nc">SpringExtension</span><span class="o">.</span><span class="na">class</span><span class="o">)</span>
<span class="kd">public</span> <span class="nd">@interface</span> <span class="nc">SpringBootTest</span> <span class="o">{</span>
    <span class="cm">/* ... */</span>
<span class="o">}</span>
</code></pre></div></div>

<p>It gets even more interesting when you check other annotations, e.g.</p>

<div class="language-java highlighter-rouge"><div class="highlight"><pre class="highlight"><code><span class="nd">@Target</span><span class="o">(</span><span class="nc">ElementType</span><span class="o">.</span><span class="na">TYPE</span><span class="o">)</span>
<span class="nd">@Retention</span><span class="o">(</span><span class="nc">RetentionPolicy</span><span class="o">.</span><span class="na">RUNTIME</span><span class="o">)</span>
<span class="nd">@Documented</span>
<span class="nd">@Inherited</span>
<span class="nd">@BootstrapWith</span><span class="o">(</span><span class="nc">DataJpaTestContextBootstrapper</span><span class="o">.</span><span class="na">class</span><span class="o">)</span>
<span class="nd">@ExtendWith</span><span class="o">(</span><span class="nc">SpringExtension</span><span class="o">.</span><span class="na">class</span><span class="o">)</span>
<span class="nd">@OverrideAutoConfiguration</span><span class="o">(</span><span class="n">enabled</span> <span class="o">=</span> <span class="kc">false</span><span class="o">)</span>
<span class="nd">@TypeExcludeFilters</span><span class="o">(</span><span class="nc">DataJpaTypeExcludeFilter</span><span class="o">.</span><span class="na">class</span><span class="o">)</span>
<span class="nd">@Transactional</span>
<span class="nd">@AutoConfigureCache</span>
<span class="nd">@AutoConfigureDataJpa</span>
<span class="nd">@AutoConfigureTestDatabase</span>
<span class="nd">@AutoConfigureTestEntityManager</span>
<span class="nd">@ImportAutoConfiguration</span>
<span class="kd">public</span> <span class="nd">@interface</span> <span class="nc">DataJpaTest</span> <span class="o">{</span>
    <span class="cm">/* ... */</span>
<span class="o">}</span>
</code></pre></div></div>

<p><a href="https://docs.spring.io/spring-boot/docs/current/api/org/springframework/boot/test/autoconfigure/orm/jpa/DataJpaTest.html">JavaDoc hints there</a>,
it’s enough to add <code class="language-plaintext highlighter-rouge">@AutoConfigureTestDatabase</code> and a DB dependency like H2 to make tests establishing H2 connection
with proper Spring properties. No need to set up H2 on your own for tests.</p>

<p>And <code class="language-plaintext highlighter-rouge">@Transactional</code> in integration tests is even more powerful. JavaDoc of <code class="language-plaintext highlighter-rouge">DataJpaTest</code> says tests marked like that</p>

<blockquote>
  <p>are transactional and roll back at the end of each test</p>
</blockquote>

<p>It means we can get a good level of isolation out of the box - each test runs within its own transaction and doesn’t
commit anything. How often did you see some <code class="language-plaintext highlighter-rouge">DbCleaner</code> used to remove everything from DB at the end of the test?
Using <code class="language-plaintext highlighter-rouge">@Transactional</code> could simplify this.</p>

<p>On the other hand, “with great power comes great responsibility”, and JPA with transactions might lead to some problems,
described well in the article <a href="https://nurkiewicz.com/2011/11/spring-pitfalls-transactional-tests.html"><em>Spring pitfalls: transactional tests considered
harmful</em></a>. Even though it’s from 2011, most
things are still relevant (perhaps just Scala part didn’t age well 😉). But we can ask here if JPA is <em>really</em> needed.
Maybe <a href="https://docs.spring.io/spring-data/relational/reference/jdbc.html">Spring Data JDBC</a> alone or other light
solutions are enough?</p>

<p>Lastly, you might often see <code class="language-plaintext highlighter-rouge">RestAssured</code> or other additional dependencies for testing your app through HTTP APIs.
Instead, you might consider simple <code class="language-plaintext highlighter-rouge">@AutoConfigureMockMvc</code> and <code class="language-plaintext highlighter-rouge">MockMvc</code> introduced directly by Spring with a fluent
API, not worse than in other solutions (but already well integrated and tested by Spring team).</p>

<h2 id="sharing-the-setup">Sharing the setup</h2>

<p>Coming up with your own set of annotations you want to use, and knowing both Spring and JUnit understand annotations on
annotations, consider introducing your custom meta-annotation, e.g.</p>

<div class="language-java highlighter-rouge"><div class="highlight"><pre class="highlight"><code><span class="nd">@Tag</span><span class="o">(</span><span class="s">"integration"</span><span class="o">)</span>
<span class="nd">@Transactional</span>
<span class="nd">@AutoConfigureMockMvc</span>
<span class="nd">@SpringBootTest</span>
<span class="nd">@Target</span><span class="o">(</span><span class="nc">ElementType</span><span class="o">.</span><span class="na">TYPE</span><span class="o">)</span>
<span class="nd">@Retention</span><span class="o">(</span><span class="nc">RetentionPolicy</span><span class="o">.</span><span class="na">RUNTIME</span><span class="o">)</span>
<span class="nd">@Documented</span>
<span class="nd">@Inherited</span>
<span class="kd">public</span> <span class="nd">@interface</span> <span class="nc">IntegrationTest</span> <span class="o">{</span> <span class="o">}</span>
</code></pre></div></div>

<p>Then, you can easily reuse the setup across all the test classes:</p>

<div class="language-java highlighter-rouge"><div class="highlight"><pre class="highlight"><code><span class="nd">@IntegrationTest</span>
<span class="kd">class</span> <span class="nc">LimitingControllerIntTest</span> <span class="o">{</span>
    <span class="cm">/* ... */</span>
<span class="o">}</span>
</code></pre></div></div>

<p>Having a single source of setup is helpful as it’s easy to start many different Spring contexts in integration tests and
each comes with its startup and memory use costs. A single point of configuration puts a focus on the common part first,
and people might rather work on it, extending it further, instead of introducing a different set of annotations on
different test classes.</p>

<p>We’ll cover more on Spring contexts and context
caching <a href="/blog/2023/12/11/a-little-more-on-spring-tests-our-optimizations.html">in the next article</a>.</p>

<p>BTW, with base classes or interfaces you might achieve same benefits as with meta-annotations, but it’s a different
discussion, touching <em>composition over inheritance</em> topic among others.</p>

<h2 id="tests-as-addons-and-enablers">Tests as addons and enablers</h2>

<p>Single point of setup and good choice of helpers is desired, but one might still create configurations in production
code like</p>

<div class="language-java highlighter-rouge"><div class="highlight"><pre class="highlight"><code><span class="nd">@Configuration</span>
<span class="kd">class</span> <span class="nc">DbConfigurationBeans</span> <span class="o">{</span>
    <span class="nd">@Bean</span>
    <span class="nd">@Profile</span><span class="o">(</span><span class="s">"!test"</span><span class="o">)</span>
    <span class="nc">CarouselRepository</span> <span class="nf">carouselRepository</span><span class="o">(</span><span class="nc">DbClient</span> <span class="n">client</span><span class="o">)</span> <span class="o">{</span>
        <span class="k">return</span> <span class="k">new</span> <span class="nf">SpannerCarouselRepository</span><span class="o">(</span><span class="n">client</span><span class="o">);</span>
    <span class="o">}</span>

    <span class="c1">// ...</span>
<span class="o">}</span>
</code></pre></div></div>

<p>This works, but might be considered a code smell. Not only production code is affected by tests (while tests should work
as enabler for production code changes, not limiting your production code freedom), but also such things don’t scale
well. It’s a matter of time you’ll need another profile, e.g. for “contract tests” where some things should be taken as
in <code class="language-plaintext highlighter-rouge">prod</code>, some as in current <code class="language-plaintext highlighter-rouge">test</code> profile. Then, another profile and another, and soon you might end up with a bunch
of configuring annotations or complex expressions used inside <code class="language-plaintext highlighter-rouge">@Profile</code> or <code class="language-plaintext highlighter-rouge">@ConditionalOn...</code> annotations, which is
actually “stringly” typed programming, where errors get discovered at runtime, not at compile-time. Alternatively, you
might end up with dozens of profiles and corresponding properties/YAML files, which is also hard to maintain.</p>

<p>Creating and combining profiles is a good topic for a dedicated article. Still, you might consider
“feature-oriented” profiles rather than mixing infrastructure, environment, app mode, and other things within the same
flat file. Perhaps <code class="language-plaintext highlighter-rouge">localstack</code> and <code class="language-plaintext highlighter-rouge">aws</code> (with URLs and access details) are good profiles as add-ons to <code class="language-plaintext highlighter-rouge">kinesis</code> (with
topics), and <code class="language-plaintext highlighter-rouge">prod</code>or <code class="language-plaintext highlighter-rouge">dev</code> can just include <code class="language-plaintext highlighter-rouge">localstack</code>+<code class="language-plaintext highlighter-rouge">kinesis</code> or <code class="language-plaintext highlighter-rouge">aws</code>+<code class="language-plaintext highlighter-rouge">kinesis</code>. Many things can also be
simplified by a good naming convention and environment variables, e.g.</p>

<div class="language-yaml highlighter-rouge"><div class="highlight"><pre class="highlight"><code><span class="na">base.solr.url</span><span class="pi">:</span> <span class="s">http://solr-cache/${ENVIRONMENT:local}/blog</span>
</code></pre></div></div>

<p>And instead of a bunch of <code class="language-plaintext highlighter-rouge">@Profile</code> annotations, consider dedicated testing properties modifying the production setup.
E.g. don’t configure conditionally in production code, but turn something off when testing:</p>

<div class="language-java highlighter-rouge"><div class="highlight"><pre class="highlight"><code><span class="c1">// just in tests</span>
<span class="nd">@Configuration</span><span class="o">(</span><span class="n">proxyBeanMethods</span> <span class="o">=</span> <span class="kc">false</span><span class="o">)</span>
<span class="nd">@ConditionalOnProperty</span><span class="o">(</span><span class="n">name</span> <span class="o">=</span> <span class="s">"app.metrics.type"</span><span class="o">,</span> <span class="n">havingValue</span> <span class="o">=</span> <span class="s">"in-mem"</span><span class="o">)</span> <span class="c1">// unknown property outside tests</span>
<span class="nd">@EnableAutoConfiguration</span><span class="o">(</span><span class="n">exclude</span> <span class="o">=</span> <span class="nc">PrometheusMetricsExportAutoConfiguration</span><span class="o">.</span><span class="na">class</span><span class="o">)</span> <span class="c1">// off!</span>
<span class="kd">class</span> <span class="nc">PrometheusTestConfiguration</span> <span class="o">{</span>

    <span class="nd">@Bean</span>
    <span class="nc">CollectorRegistry</span> <span class="nf">collectorRegistry</span><span class="o">()</span> <span class="o">{</span>
        <span class="k">return</span> <span class="k">new</span> <span class="nf">CollectorRegistry</span><span class="o">();</span>
    <span class="o">}</span>
<span class="o">}</span>
</code></pre></div></div>

<p>Sometimes, you might also override your production beans in tests:</p>

<div class="language-java highlighter-rouge"><div class="highlight"><pre class="highlight"><code><span class="nd">@Bean</span>
<span class="nd">@Primary</span>
<span class="nc">SpannerOptions</span> <span class="nf">spannerEmulatorOptions</span><span class="o">(</span>
        <span class="nc">SpannerOptions</span> <span class="n">original</span><span class="o">,</span>
        <span class="nd">@Value</span><span class="o">(</span><span class="s">"${spanner.emulator-host}"</span><span class="o">)</span> <span class="nc">String</span> <span class="n">spannerHost</span><span class="o">)</span> <span class="o">{</span>
    <span class="k">return</span> <span class="n">original</span><span class="o">.</span><span class="na">toBuilder</span><span class="o">()</span>
            <span class="o">.</span><span class="na">setNumChannels</span><span class="o">(</span><span class="mi">1</span><span class="o">)</span>
            <span class="o">.</span><span class="na">setSessionPoolOption</span><span class="o">(</span><span class="nc">SessionPoolOptions</span><span class="o">.</span><span class="na">newBuilder</span><span class="o">().</span><span class="na">setMaxSessions</span><span class="o">(</span><span class="mi">1</span><span class="o">).</span><span class="na">build</span><span class="o">())</span>
            <span class="o">.</span><span class="na">setEmulatorHost</span><span class="o">(</span><span class="n">spannerHost</span><span class="o">).</span><span class="na">build</span><span class="o">();</span>
<span class="o">}</span>
</code></pre></div></div>

<h2 id="last-words">Last words</h2>

<p>Good test setup and hygiene are essential, but tests might get out of hand even with a single setup source and start
more Spring contexts than needed.
In <a href="/blog/2023/12/11/a-little-more-on-spring-tests-our-optimizations.html">the following article</a>,
we’ll cover our journey to put tests back on track and improve their speed.</p>]]></content><author><name>Mateusz Chrzonstowski</name></author><category term="blog" /><summary type="html"><![CDATA[Within Paramount+, we recently improved our integration tests and their execution time, especially on CI.]]></summary></entry><entry><title type="html">A little more on Spring tests - our optimizations</title><link href="https://paramount.tech/blog/2023/12/11/a-little-more-on-spring-tests-our-optimizations.html" rel="alternate" type="text/html" title="A little more on Spring tests - our optimizations" /><published>2023-12-11T00:00:00+00:00</published><updated>2023-12-11T00:00:00+00:00</updated><id>https://paramount.tech/blog/2023/12/11/a-little-more-on-spring-tests-our-optimizations</id><content type="html" xml:base="https://paramount.tech/blog/2023/12/11/a-little-more-on-spring-tests-our-optimizations.html"><![CDATA[<p>In <a href="/blog/2023/12/11/a-little-more-on-spring-tests-good-practices.html">the previous article</a> we covered good practices
for writing tests. Here, we focus more on our road toward executing them faster, especially on CI.</p>

<p>
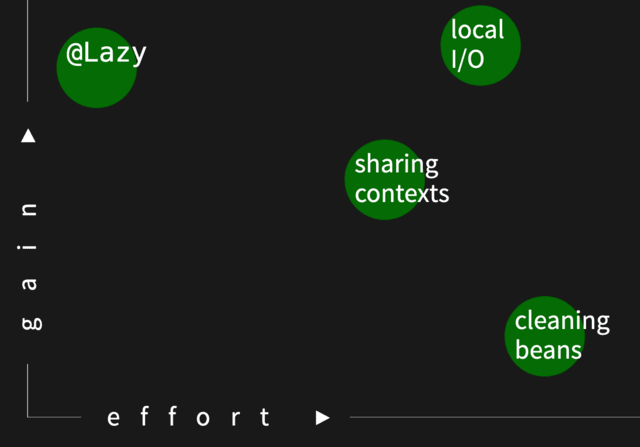
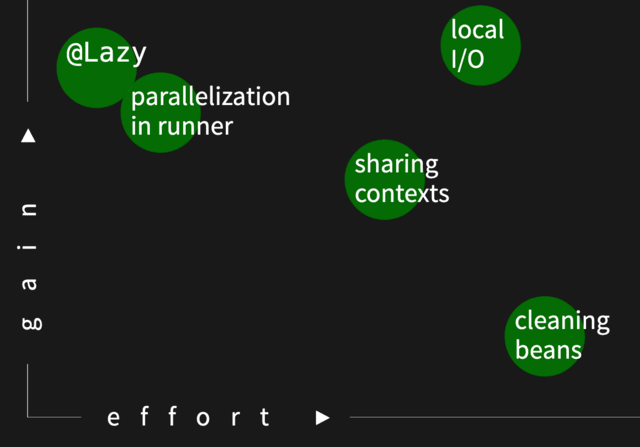
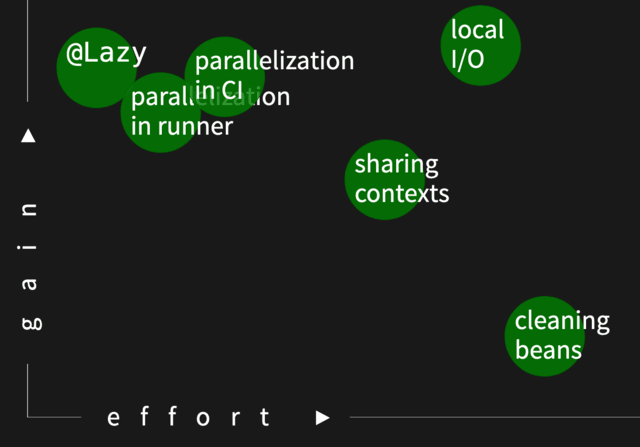
Something working for us not necessarily will work for you, but we provide our subjective “effort vs. gain” estimates,
so you can quickly see where we got the boost from, check if similar things are slowing your CI down, and consider
investing time in them or not.</p>

<h2 id="50-shades-of-spring-context">50 shades of Spring context</h2>

<figure class="image-with-caption">
  <img src="/blog/img/spring-tests/micro2.jpg" alt="One big vs. many small contexts" />
  <figcaption>Modified <a href="https://twitter.com/alvaro_sanchez/status/1288415655960682501">Álvaro Sánchez-Mariscal's
tweet</a></figcaption>
</figure>

<p>One thing emphasized in <a href="/blog/2023/12/11/a-little-more-on-spring-tests-good-practices.html">the previous article</a> was
to focus on sharing test annotations. Sometimes, you can still find multiple Spring annotations in your codebase though,
and it’s important to understand the consequences of having them.</p>

<p>Each of:</p>

<ul>
  <li><code class="language-plaintext highlighter-rouge">@WebMvcTest</code></li>
  <li><code class="language-plaintext highlighter-rouge">@SpringJUnitWebConfig</code></li>
  <li><code class="language-plaintext highlighter-rouge">@DataLdapTest</code></li>
  <li><code class="language-plaintext highlighter-rouge">@DataMongoTest</code></li>
  <li><code class="language-plaintext highlighter-rouge">@SpringJUnitConfig</code></li>
  <li><code class="language-plaintext highlighter-rouge">@DataJdbcTest</code></li>
  <li><code class="language-plaintext highlighter-rouge">@DataRedisTest</code></li>
</ul>

<p>
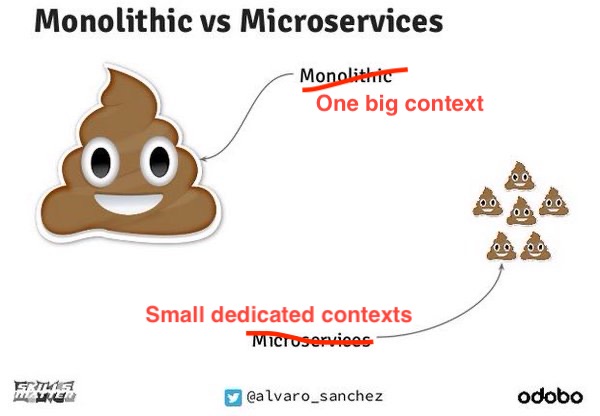
might start reasonably fast as it only loads a subset of Spring context (just required beans for handling HTTP,
just required beans for databases, just listed beans, etc.), but having them all might sum up a lot of time. An
alternative would be to start one, big context with <code class="language-plaintext highlighter-rouge">@SpringBootTest</code> and then it’d be started just once, cached, and
reused for all tests.</p>

<p>From a CI perspective, where you run all the tests anyway, it might be a very important decision to make.</p>

<h2 id="am-i-truly-having-a-single-context">Am I truly having a single context?</h2>

<p>Even if you have just a single <code class="language-plaintext highlighter-rouge">@SpringBootTest</code> annotation in your project, you might still have multiple contexts
starting up. Take a quick look at your logs from tests and count how many times you see a famous Spring logo:</p>

<div class="language-text highlighter-rouge"><div class="highlight"><pre class="highlight"><code>  .   ____          _            __ _ _
 /\\ / ___'_ __ _ _(_)_ __  __ _ \ \ \ \
( ( )\___ | '_ | '_| | '_ \/ _` | \ \ \ \
 \\/  ___)| |_)| | | | | || (_| |  ) ) ) )
  '  |____| .__|_| |_|_| |_\__, | / / / /
 =========|_|==============|___/=/_/_/_/
 :: Spring Boot ::               (v2.7.15)
</code></pre></div></div>

<p>Each occurrence means a new context is starting up, but to get a full picture, check logs after configuring:</p>

<div class="language-yaml highlighter-rouge"><div class="highlight"><pre class="highlight"><code><span class="na">logging.level</span><span class="pi">:</span>
  <span class="na">org.springframework.test.context.cache</span><span class="pi">:</span> <span class="s">DEBUG</span>
</code></pre></div></div>

<p>You should find something like this (normally a one-liner, but split for readability):</p>

<div class="language-text highlighter-rouge"><div class="highlight"><pre class="highlight"><code>Spring test ApplicationContext cache statistics:
[DefaultContextCache@10fc1a22
    size = 1,
    maxSize = 32,
    parentContextCount = 0,
    hitCount = 6,
    missCount = 1
]
</code></pre></div></div>

<p>Above we luckily have just a single context (<code class="language-plaintext highlighter-rouge">size = 1</code>), but as you can read, there might be up to 32 contexts cached.
It all happens thanks to <code class="language-plaintext highlighter-rouge">SpringExtension</code>, but under the hood, it utilizes a <code class="language-plaintext highlighter-rouge">static</code> object with a map typed
as <code class="language-plaintext highlighter-rouge">Map&lt;MergedContextConfiguration, ApplicationContext&gt;</code>.</p>

<p>How keys are generated for this map? There are multiple ingredients of <code class="language-plaintext highlighter-rouge">MergedContextConfiguration</code>, but each time you
add:</p>

<ul>
  <li><code class="language-plaintext highlighter-rouge">@TestPropertySource</code></li>
  <li><code class="language-plaintext highlighter-rouge">@DynamicPropertySource</code></li>
  <li><code class="language-plaintext highlighter-rouge">@ActiveProfiles</code></li>
  <li><code class="language-plaintext highlighter-rouge">@ContextConfiguration</code></li>
  <li><code class="language-plaintext highlighter-rouge">@MockBean</code></li>
  <li><code class="language-plaintext highlighter-rouge">@SpyBean</code></li>
  <li><code class="language-plaintext highlighter-rouge">@Import</code></li>
</ul>

<p>somewhere in tests, you basically end up with a new context to start. E.g. <code class="language-plaintext highlighter-rouge">@MockBean</code> registers a new thing in Spring,
usually overriding the base one. Each time you have different beans or different properties/profiles resulting in new
beans, you end up with a new context, so it’s not that hard to get more than a single one.</p>

<p>There is also another annotation (which should be probably prohibited) - <code class="language-plaintext highlighter-rouge">@DirtiesContext</code>. It basically tells to not
cache the context, so it’s a performance killer. This single annotation was the main source of problems for Philip
Riecks, and he summarized them in his talk <a href="https://www.youtube.com/watch?v=c-GV2PxymoY"><em>How fixing a broken window cut down our build time by
50%</em></a>.</p>

<figure class="image-with-caption">
  <img src="/blog/img/spring-tests/1.png" alt="Significant gain, medium effort" />
  <figcaption></figcaption>
</figure>

<p>
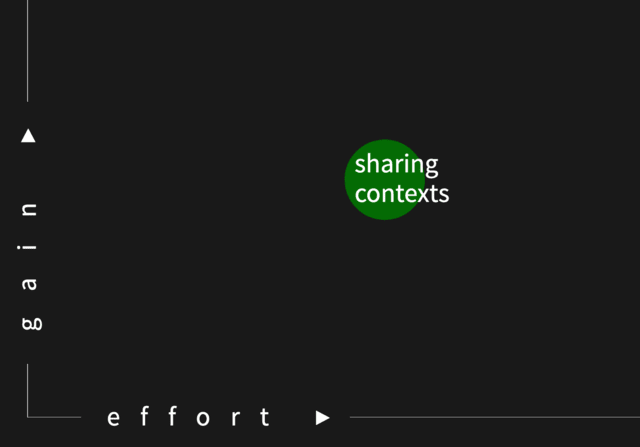
In our subjective “effort vs. gain” scale, we put lowering the number of contexts as a high gain, but with some work to
do. In our case, most contexts were coming from <code class="language-plaintext highlighter-rouge">@MockBean</code> and <code class="language-plaintext highlighter-rouge">@SpyBean</code>, so we just needed to set up underlying beans
rather than mocking them in individual tests. Luckily, some of them were not even used, so we could just remove them.
Another popular source of contexts in our codebase was various properties, and we did our best to set the majority of
them just in a base class (e.g. WireMock URLs could all coexist as they were for simulating different systems).</p>

<h2 id="going-deeper---lazy-initialization">Going deeper - lazy initialization</h2>

<p>How to further tune our context? Let’s focus on its startup time.
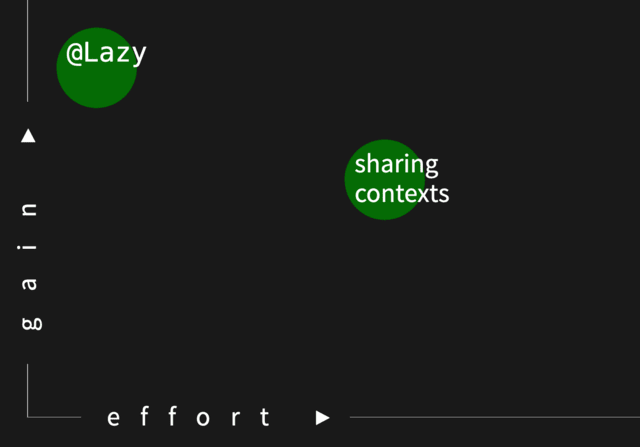
</p>

<p>Usually, <code class="language-plaintext highlighter-rouge">@Lazy</code> next to the bean injection is used as an ugly workaround for cyclic dependencies (<code class="language-plaintext highlighter-rouge">A</code> requires <code class="language-plaintext highlighter-rouge">B</code>,
which requires <code class="language-plaintext highlighter-rouge">C</code>, which requires <code class="language-plaintext highlighter-rouge">A</code>). We don’t encourage using it in the production code, but how about registering
everything in tests in a lazy way?</p>

<div class="language-yaml highlighter-rouge"><div class="highlight"><pre class="highlight"><code><span class="na">spring</span><span class="pi">:</span>
  <span class="na">main</span><span class="pi">:</span>
    <span class="na">lazy-initialization</span><span class="pi">:</span> <span class="kc">true</span>
</code></pre></div></div>

<p>It appeared to be super effective for us. Our codebase is not fully covered with integration tests and even in
well-tested systems, you probably don’t need Actuator, some thread pools, and other things that normally start up with
Spring.</p>

<p>Also, even when limiting the number of contexts, you might still end up with a few of them, and it might be like the
first needs just 60% of beans, while another uses 50% (some of the previous ones plus the remaining 40%), and last uses
just 10%, etc. Then, just a required part of beans will fully start everywhere thanks to the above single property.</p>

<p>Last but not least, even if not having any boost at all (as your integration tests cover everything, and you have just a
single context), lazy init can still help, e.g. when developing an isolated feature, for which you constantly run just a
single integration test class (which doesn’t need all the beans). Lazy initialization works then similarly to having
just <code class="language-plaintext highlighter-rouge">@SpringJUnitConfig</code> listing just required beans for that test (faster startup time).</p>

<p>However, one thing to remember is that if your code has an actual cyclic dependency, preventing Spring context from
starting, your tests won’t discover this. It wasn’t a problem for us though, as we already had a dedicated step in our
pipeline for checking if app is able to start with the production configuration.</p>

<figure class="image-with-caption">
  <img src="/blog/img/spring-tests/2.png" alt="SignificantHuge gain, little to no work" />
  <figcaption></figcaption>
</figure>

<p>Worth emphasizing that after using this setup for more than a year we still recommend it. There was just a small number
of cases, where we needed to explicitly inject something in tests to load it, and it took us minutes to realize, as we
all knew what setup we have. Example for cache metrics we were asserting against:</p>

<div class="language-java highlighter-rouge"><div class="highlight"><pre class="highlight"><code><span class="nd">@Autowired</span>
<span class="nc">CacheTest</span><span class="o">(</span>
        <span class="nd">@Qualifier</span><span class="o">(</span><span class="no">PARTICULAR_CACHE_MANAGER</span><span class="o">)</span> <span class="nc">CacheManager</span> <span class="n">caches</span><span class="o">,</span>
        <span class="nc">CacheMetricsRegistrar</span> <span class="n">eagerInitForMetrics</span><span class="o">)</span> <span class="o">{</span>
    <span class="k">assert</span> <span class="n">eagerInitForMetrics</span> <span class="o">!=</span> <span class="kc">null</span><span class="o">;</span>
    <span class="n">closer</span><span class="o">.</span><span class="na">register</span><span class="o">(()</span> <span class="o">-&gt;</span> <span class="n">caches</span><span class="o">.</span><span class="na">getCache</span><span class="o">(</span><span class="no">PARTICULAR_CACHE</span><span class="o">).</span><span class="na">clear</span><span class="o">());</span>
<span class="o">}</span>
</code></pre></div></div>

<h2 id="removing-unnecessary-beans">Removing unnecessary beans</h2>

<p>Encouraged by the previous success, we decided to go even further and remove unnecessary beans from the context. The
first challenge was to find them, but there
is <a href="https://docs.spring.io/spring-boot/docs/current/reference/html/features.html#features.logging.console-output">yet another configuration property</a>
one can use:</p>

<div class="language-yaml highlighter-rouge"><div class="highlight"><pre class="highlight"><code><span class="na">debug</span><span class="pi">:</span> <span class="kc">true</span>
</code></pre></div></div>

<p>It provides <em>CONDITIONS EVALUATION REPORT</em> showing what was picked up, and thanks to which conditions.</p>

<p>Another approach is to use the <code class="language-plaintext highlighter-rouge">/actuator/beans</code> endpoint, but you should use it in each integration test context
separately, so it’s not super easy, especially when having multiple apps starting on different random ports and not
being fully sure which started where.
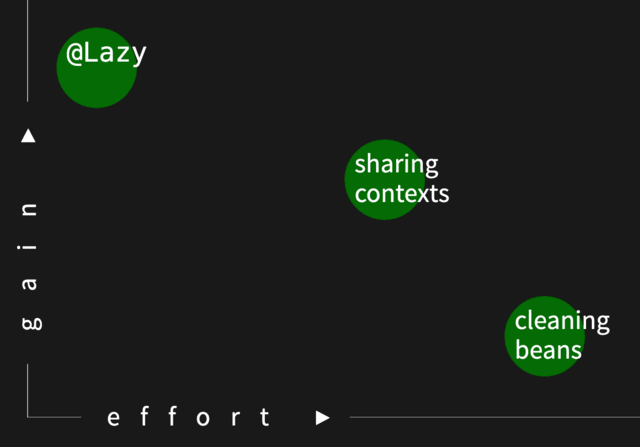
</p>

<figure class="image-with-caption">
  <img src="/blog/img/spring-tests/3.png" alt="No gain, much effort" />
  <figcaption></figcaption>
</figure>

<p>At the end of the first iteration, it appeared we were too eager to start it, and we should rather find more evidence
that it might be worth the effort. We introduced some cleanup though, so it ended up being boy scouting, not an
optimization.</p>

<p>However, in 2024, we got to know about a pretty new
tool, <a href="https://github.com/linyimin0812/spring-startup-analyzer">spring-startup-analyzer</a>, and with its help we could
clean our context e.g. from HBase as it wasn’t needed in most tests, yet it appeared to take some time to start.</p>

<h2 id="io-dependencies">IO dependencies</h2>

<p>IO is a common source of problems when it comes to performance. Not only in tests but in our case especially there, as
we had some tests calling the dev environment.</p>

<p>We started a parallel effort to move such tests into a separate flow, but also to test, especially our Redis
integration, better.</p>

<p>Many folks might now think of Testcontainers, but for Testcontainers you need Docker on developers’ machines and CI
agents, and it’s not always possible. In one codebase we decided to go with shared, local, embedded Redis instead and
that change alone decreased the execution time of our integration tests on CI from 27 to 16 minutes.</p>

<p>When sharing the same Redis instance, we had to make sure to clean it properly or to use different keys for each test.
We went with the latter, as it was similar to how we were using it when calling Redis on the dev environment.</p>

<p>However, in a smaller app, with lower number of contributors, we decided to go with Testcontainers and one of the
challenges was to make the local setup smooth for developers. In the end we’ve
chosen <a href="https://rancherdesktop.com/rancher-desktop-with-docker/">Rancher Desktop</a> for that.</p>

<p>We also came up with the example repo showing various context (sliced, shared) and Testcontainers (restarting, shared,
reused) patterns you might want to check: <a href="https://github.com/mat3e/downloads-service/">downloads-service</a>.</p>

<figure class="image-with-caption">
  <img src="/blog/img/spring-tests/4.png" alt="Huge gain, medium effort" />
  <figcaption></figcaption>
</figure>

<h2 id="parallelization">Parallelization</h2>

<p>Multi-threading is a common way of speeding things up, but also a risky one. Not only you need to be careful about
“normal” shared resources, but also all the <code class="language-plaintext highlighter-rouge">static</code> fields and singletons one put in tests not considering their
parallel execution.</p>

<p>We analyzed 2 options for parallelization:</p>

<ol>
  <li>With the build tool (Gradle in our case)</li>
  <li>With test framework (JUnit 5)</li>
</ol>

<p>It quickly appeared first parallelizes with processes (and different JVMs), so context caching described above was not
working as well as it could. Also, Gradle didn’t allow concurrent <strong>test method</strong> execution, and it appeared to work
best to focus just on a limited number of classes, but with scores of tests (Pareto’s principle in action). And it’s
enough to have <code class="language-plaintext highlighter-rouge">@ParameterizedTest</code> to have “scores of tests” in a class.</p>

<p>Not a surprise we added:</p>

<div class="language-properties highlighter-rouge"><div class="highlight"><pre class="highlight"><code><span class="py">junit.jupiter.execution.parallel.enabled</span><span class="p">=</span><span class="s">true</span>
</code></pre></div></div>

<p>and</p>

<div class="language-java highlighter-rouge"><div class="highlight"><pre class="highlight"><code><span class="nd">@Execution</span><span class="o">(</span><span class="nc">ExecutionMode</span><span class="o">.</span><span class="na">CONCURRENT</span><span class="o">)</span>
<span class="kd">class</span> <span class="nc">ConcurrentTest</span> <span class="kd">extends</span> <span class="nc">IntegrationTest</span> <span class="o">{</span>
    <span class="cm">/* ... */</span>
<span class="o">}</span>
</code></pre></div></div>

<p>here and there, and enjoyed the boost from parallel test method execution within multiple threads. As mentioned, we
focused on limited test classes, especially those testing something with Redis.</p>

<figure class="image-with-caption">
  <img src="/blog/img/spring-tests/5.png" alt="Significant gain, small effort" />
  <figcaption></figcaption>
</figure>

<h2 id="further-parallelization">Further parallelization</h2>

<p>Enjoying parallelization, we quickly realized our different tags, already grouping tests e.g. from different app
“modes”, could just run in parallel on our Jenkins build agents:</p>

<div class="language-groovy highlighter-rouge"><div class="highlight"><pre class="highlight"><code><span class="n">stage</span><span class="o">(</span><span class="s1">'Tests'</span><span class="o">)</span> <span class="o">{</span>
    <span class="n">parallel</span> <span class="o">{</span> <span class="c1">// we added this</span>
        <span class="n">stage</span><span class="o">(</span><span class="s1">'Unit tests'</span><span class="o">)</span> <span class="o">{</span>
            <span class="n">steps</span> <span class="o">{</span>
                <span class="n">sh</span> <span class="s2">"./gradlew test"</span>
            <span class="o">}</span>
        <span class="o">}</span>
        <span class="n">stage</span><span class="o">(</span><span class="s1">'Integration tests'</span><span class="o">)</span> <span class="o">{</span>
            <span class="n">steps</span> <span class="o">{</span>
                <span class="n">sh</span> <span class="s2">"./gradlew integrationTest"</span>
            <span class="o">}</span>
        <span class="o">}</span>
        <span class="n">stage</span><span class="o">(</span><span class="s1">'Integration tests intl'</span><span class="o">)</span> <span class="o">{</span>
            <span class="n">steps</span> <span class="o">{</span>
                <span class="n">sh</span> <span class="s2">"./gradlew integrationTestIntl"</span>
            <span class="o">}</span>
        <span class="o">}</span>
        <span class="c1">// ...</span>
    <span class="o">}</span>
<span class="o">}</span>
</code></pre></div></div>

<p>The same can be achieved with other CI systems, e.g. by using different jobs in GitHub Actions.</p>

<p>The problematic thing was Gradle locking, but we just needed to ensure compilation of test sources happens before tests,
and all the parallel tests run on top of already compiled classes.</p>

<figure class="image-with-caption">
  <img src="/blog/img/spring-tests/6.png" alt="Significant gain, small effort" />
  <figcaption></figcaption>
</figure>

<h2 id="last-words">Last words</h2>

<p>In the end, we went from 32 to 10 minutes for our CI pipeline, and we called it a day. We could probably go even
further, but you need to stop somewhere, and we were happy with the result. We also decided to utilize our time
for spreading the knowledge and ensuring team members are aware of the changes, and they won’t add more contexts
or move away from any other optimizations we introduced.</p>]]></content><author><name>Damian Kaczmarczyk</name></author><category term="blog" /><summary type="html"><![CDATA[In the previous article we covered good practices for writing tests. Here, we focus more on our road toward executing them faster, especially on CI.]]></summary></entry><entry><title type="html">Approaching Swift Concurrency</title><link href="https://paramount.tech/blog/2023/12/06/approaching-swift-concurrency.html" rel="alternate" type="text/html" title="Approaching Swift Concurrency" /><published>2023-12-06T00:00:00+00:00</published><updated>2023-12-06T00:00:00+00:00</updated><id>https://paramount.tech/blog/2023/12/06/approaching-swift-concurrency</id><content type="html" xml:base="https://paramount.tech/blog/2023/12/06/approaching-swift-concurrency.html"><![CDATA[<blockquote>
  <p>This article was written down in the Swift 5.9 and Xcode 15 era.</p>
</blockquote>

<p>Swift Concurrency debuted in the WWDC 2021 with the Swift 5.5. Initially, the functionality was constrained to the iOS 15+. But then Doug from the <a href="https://www.swift.org/community/">Swift Language Steering Group</a> backported it to iOS 13: <a href="https://github.com/apple/swift/pull/39342/files">https://github.com/apple/swift/pull/39342/files</a>. Years passed, and the OS restrictions became less of a problem. Apple has put some effort into adopting the new concurrency in their libraries. Be careful, though, because they are not 100% ready yet. Anyway, the stability and maturity improved, and the Swift Concurrency gradually became available for more and more projects. In this article, I would like to explore a few ways that make the shift from the traditional way of doing concurrency a little bit less painful.</p>

<h2 id="step-1-have-a-specific-problem">Step 1. Have a specific problem.</h2>

<p>Concurrency is hard. Unfamiliar concurrency is even more challenging. Don’t just drop some operations onto the background threads for the respect points or giggles. Think about the other developers who will read and maintain your code. Even if you have a side project just for yourself, the Future You will be reasoning about the code. Leaving the complicated system difficult to debug, extend, reuse, or refactor will upset any potential reader and discourage further tries. Your best bet is to avoid concurrency altogether. That’s a skill in itself! If only you could work around your problem using just a single thread, by all means, go for it. Chances are you will be glad you did.</p>

<p>But sometimes, the problem is so heavy that no single-threading spell does the job. I have the macOS application that periodically executes some git operations. If you’ve ever worked with a git repository, you’ve most likely noticed that git status or git checkout could take a few seconds to complete. Doing that on the main thread in the macOS ecosystem results in the <a href="https://en.wikipedia.org/wiki/Spinning_pinwheel">spinning beachball of death</a>. Throwing the ball in people’s faces is often considered rude, so leaving that problem for the main thread was not an option for me.</p>

<p>So invest in this concurrency thing only if you genuinely have to. If you do, there is one more educational benefit worth mentioning. Knowledge retention is much better when applying new techniques in real life. Also, the Swift Concurrency spans across multiple complex topics. The concrete problem will help you prioritize the knowledge best suited to your situation.</p>

<h2 id="step-2-enable-diagnostics">Step 2. Enable diagnostics.</h2>

<p>Swift Concurrency is an ongoing initiative. Only some things are fully ready. Asynchronous code that works in the latest Swift release (5.9 at the moment) may not work in version 6. To ensure your code passes even the most rigorous set of rules, enable complete <strong>Strict Concurrency Checking</strong> in the Build Settings of the app target:</p>

<figure class="image-with-caption">
  <img src="/blog/img/approaching-swift-concurrency/completeConcurrencyChecking.png" alt="Complete Strict Concurrency Checking" />
  <figcaption></figcaption>
</figure>

<p>You can also do it for the standalone Swift package in the Package.swift manifest file. Assuming you can use Swift tools, at least on version 5.8.</p>

<div class="language-swift highlighter-rouge"><div class="highlight"><pre class="highlight"><code><span class="c1">// swift-tools-version: 5.9</span>

<span class="kd">import</span> <span class="kt">PackageDescription</span>

<span class="k">let</span> <span class="nv">package</span> <span class="o">=</span> <span class="kt">Package</span><span class="p">(</span>
    <span class="nv">name</span><span class="p">:</span> <span class="s">"AsyncUtilities"</span><span class="p">,</span>
    <span class="nv">products</span><span class="p">:</span> <span class="p">[</span> <span class="o">...</span> <span class="p">],</span>
    <span class="nv">targets</span><span class="p">:</span> <span class="p">[</span>
        <span class="o">.</span><span class="nf">target</span><span class="p">(</span>
            <span class="nv">name</span><span class="p">:</span> <span class="s">"AsyncUtilities"</span><span class="p">,</span>
            <span class="nv">swiftSettings</span><span class="p">:</span> <span class="p">[</span><span class="o">.</span><span class="nf">enableExperimentalFeature</span><span class="p">(</span><span class="s">"StrictConcurrency=complete"</span><span class="p">)])</span>
    <span class="p">]</span>
<span class="p">)</span>
</code></pre></div></div>

<p>It checks if the types that cross between the different threads are okay to do that (more on that below). It also verifies that the actor types are called only from the isolated contexts as they should.</p>

<p>The second diagnostic tool that can assist you is Thread Sanitizer. It helps detect data races - multiple unsynchronized reads and writes to the shared resource from the different threads. You can find it in the <em>target scheme settings (CMD+&lt;), Run action, Diagnostics tab</em>:</p>

<figure class="image-with-caption">
  <img src="/blog/img/approaching-swift-concurrency/threadSanitizer.png" alt="Thread Sanitizer" />
  <figcaption></figcaption>
</figure>

<p>The most significant benefit of these diagnostics is that they will help you learn Swift Concurrency for current and future use. You will get a deeper understanding and awareness of where the risks and the pain points are. The tools will force you to notice things that you would otherwise miss.</p>

<h2 id="step-3-be-mindful-of-objects-that-jump-between-the-threads">Step 3. Be mindful of objects that jump between the threads.</h2>

<p>Let’s consider the code implemented using the traditional GCD model:</p>

<div class="language-swift highlighter-rouge"><div class="highlight"><pre class="highlight"><code><span class="kd">private</span> <span class="k">let</span> <span class="nv">backgroundQueue</span> <span class="o">=</span> <span class="kt">DispatchQueue</span><span class="p">(</span><span class="nv">label</span><span class="p">:</span> <span class="s">"com.example"</span><span class="p">,</span> <span class="nv">qos</span><span class="p">:</span> <span class="o">.</span><span class="n">background</span><span class="p">)</span>

<span class="kd">private</span> <span class="kd">func</span> <span class="nf">oldThreadsCrossingWithoutSendableCheck</span><span class="p">()</span> <span class="p">{</span>
    <span class="n">backgroundQueue</span><span class="o">.</span><span class="k">async</span> <span class="p">{</span>
        <span class="c1">// hello from the background thread</span>
        <span class="k">let</span> <span class="nv">ultraHeavyResult</span> <span class="o">=</span> <span class="k">self</span><span class="o">.</span><span class="nf">ultraHeavyRenderingOperation</span><span class="p">()</span>

        <span class="kt">DispatchQueue</span><span class="o">.</span><span class="n">main</span><span class="o">.</span><span class="k">async</span> <span class="p">{</span>
            <span class="c1">// hello from the main thread</span>
            <span class="k">self</span><span class="o">.</span><span class="nf">animate</span><span class="p">(</span><span class="nv">result</span><span class="p">:</span> <span class="n">ultraHeavyResult</span><span class="p">)</span>
        <span class="p">}</span>
    <span class="p">}</span>
<span class="p">}</span>
</code></pre></div></div>

<p>We can notice that the mysterious <code class="language-plaintext highlighter-rouge">ultraHeavyResult</code> and enigmatic <code class="language-plaintext highlighter-rouge">self</code> cross freely between the background and main threads. There is no border control, security check, or detector canine. Objects could smuggle weapons or exotic animals (also stuffed), and the compiler or other diagnostics would not care. As a result, the developer could only bother about these things once something starts crashing.</p>

<p>The situation is different with the strict checking:</p>

<figure class="image-with-caption">
  <img src="/blog/img/approaching-swift-concurrency/borderControlCheck.png" alt="Strict Checking Control" />
  <figcaption></figcaption>
</figure>

<p>We can see that the compiler issues some warnings against the types that cross the different concurrency domains. (By the way, Strict Concurrency Checking works for new Swift Concurrency and older GCD/NSOperation code!) Indeed, the border control does operate, and the travelers need either a Sendable passport or @unchecked Sendable diplomatic immunity.</p>

<p>The Sendable is a unique protocol that doesn’t require methods or properties but has semantic requirements. Fulfilling these requirements makes the type thread-safe. <a href="https://developer.apple.com/documentation/swift/sendable">Sendable’s documentation</a> gives the best explanation.</p>

<p>@unchecked Sendable is a promise that the declared type is thread-safe. It bypasses the compiler check. When designing your types, prefer the Sendable conformance first unless impossible. @unchecked Sendable is helpful for the following two scenarios:</p>

<p>1) to mark native system types, which “should” be thread-safe, but Apple hasn’t conformed them to Sendable. I once had to send a <code class="language-plaintext highlighter-rouge">UserDefaults</code> object to the background utility task, so I did something like this:</p>

<div class="language-swift highlighter-rouge"><div class="highlight"><pre class="highlight"><code><span class="kd">extension</span> <span class="kt">UserDefaults</span><span class="p">:</span> <span class="kd">@unchecked</span> <span class="kt">Sendable</span> <span class="p">{</span> <span class="p">}</span>
</code></pre></div></div>

<p>2) to mark thread-safe type that cannot be marked Sendable. An example here could be a perfectly thread-safe class that you cannot, for some reason, make final. Even more common is an unfortunate case in which a single var of non-sendable type ruins the Sendable conformance for your final class. Even if you have a perfect locking mechanism and everything works as expected, you still need @unchecked Sendable.</p>

<p>There is also a third hidden use case, which you should never do but which you should know about. Sendable is a thread safety promise. And as with every promise, it can be broken. Nothing prevents you from marking the type as @unchecked Sendable when this type is not thread-safe and should never be called as such! This is especially tempting for the big types with lots of mutable states. Adding the fake @unchecked Sendable tells Strict Concurrency Checking to let you off the hook. It’s a mechanism that sits next to the disabling warning or Swiftlint check. Do not fall for this dark side of the thread safety. In the unfamiliar code, develop the habit of checking if the author used the @unchecked Sendable correctly.</p>

<h2 id="step-4-identify-resources-that-should-be-protected">Step 4. Identify resources that should be protected.</h2>

<p>The typical situation in the multithreading code is the existence of a resource that should be accessed by only one thread at a time. One such resource in my macOS app with the git operations was the url to the git repository folder. Each git command requires that url. Meanwhile, the user could always change this url to the new repo. I wanted to protect the url, so the write and read access is exclusive to one thread at a time (atomic). I eventually put the url variable in an actor, which gave me what I needed.</p>

<p>If you’ve already found the types that traverse the threads, you will find it equally helpful to pinpoint the objects that should have protected access. It’s usually okay to allow multiple simultaneous reads. But if the shared resource mutates itself or another resource, it’s a good and safe practice to protect it from concurrent use. In the new reality, we have two options: actors and manual locking, typically with a lock or serial queue. There are essential performance distinctions between both possibilities which you should research. But in this article, I would like to give an additional practical hint for picking the right one for you.</p>

<p>It’s possible to call actor methods only from the asynchronous contexts. You must call them from another async method or inside <code class="language-plaintext highlighter-rouge">Task { // here }</code>. This option might not be the best for the types also used in non-asynchronous code. An example could be a type that monitors network connection. Most likely, there are places where it’s just most practical to check <code class="language-plaintext highlighter-rouge">isOnline</code> in a regular main thread code. In such a case, an actor would probably annoy many people. Furthermore, if you have a large codebase, be prepared that the transition into an actor may trigger an avalanche of required changes in the places where the instances of actor type are called.</p>

<h2 id="step-5-keep-the-types-that-participate-in-concurrency-as-small-as-possible">Step 5. Keep the types that participate in concurrency as small as possible.</h2>

<p>Imagine some heavy processing async operation - a perfect candidate for the background thread. This operation happens to be a part of the business logic layer, so it sits in the view model, interactor, or in the other place for the business logic. We quickly fire a task:</p>

<div class="language-swift highlighter-rouge"><div class="highlight"><pre class="highlight"><code><span class="kd">func</span> <span class="nf">dispatchUltraHeavyProcessing</span><span class="p">()</span> <span class="p">{</span>
    <span class="kt">Task</span><span class="p">(</span><span class="nv">priority</span><span class="p">:</span> <span class="o">.</span><span class="n">low</span><span class="p">)</span> <span class="p">{</span>
        <span class="k">await</span> <span class="nf">ultraHeavyProcessing</span><span class="p">()</span>
    <span class="p">}</span>
<span class="p">}</span>
</code></pre></div></div>
<p>Easy enough, everything seems fine. That is until we enable diagnostics and realize what crosses the concurrency boundaries. Oh no! That would be <code class="language-plaintext highlighter-rouge">self</code>!</p>

<div class="language-swift highlighter-rouge"><div class="highlight"><pre class="highlight"><code><span class="kt">Task</span><span class="p">(</span><span class="nv">priority</span><span class="p">:</span> <span class="o">.</span><span class="n">low</span><span class="p">)</span> <span class="p">{</span>
    <span class="k">await</span> <span class="k">self</span><span class="o">.</span><span class="nf">ultraHeavyProcessing</span><span class="p">()</span>
<span class="p">}</span>
</code></pre></div></div>
<p>Now, our business logic type needs to be thread-safe. Suddenly, we might find ourselves in a massive view model. One that has an enormous number of mutable states which could take ages to properly protect. Because the current sprint finishes today (<em>Narrator: the sprint finished yesterday.</em>), we mark the whole class with <code class="language-plaintext highlighter-rouge">@MainActor</code> and create a tech ticket for later. Fine, maybe we ended up with the massive scope that doesn’t necessarily need to be on Main Actor, but at least we scored some points for “<em>konkurensy</em>”.</p>

<p>The example above illustrates how careful we need to be with the size of the types that participate in concurrency. We wouldn’t have a problem with a small value type or one with no state. Locking one or two variables is more appealing than having nine or ten vars. The <a href="https://en.wikipedia.org/wiki/Single-responsibility_principle">Single Responsibility Principle</a> shines in this area. Remember, the smaller and more specialized types, the easier to work with them in a multithreading environment.</p>

<h2 id="summary">Summary</h2>

<p>Hopefully, you have a task that is a good fit for the background execution. Attempts to work it out on the main thread have already failed. Think of what parts of this task would be passed between the threads. Think about resources that should be protected and whether the actor or manual lock would make more sense. Are all interested types small and manageable enough? Enable diagnostics and do the magic. You got this!</p>

<h2 id="additional-resources">Additional resources</h2>

<p>Your specific problem will dictate which resource is most useful for you. I found the WWDC 2021 <em>“Swift concurrency: Update a sample app”</em> video most universally applicable. This session may be a good investment if you have one spare hour.</p>

<p>Video: <a href="https://developer.apple.com/videos/play/wwdc2021/10194">https://developer.apple.com/videos/play/wwdc2021/10194</a>.</p>

<p>Sample Code: <a href="https://developer.apple.com/documentation/swift/updating_an_app_to_use_swift_concurrency">https://developer.apple.com/documentation/swift/updating_an_app_to_use_swift_concurrency</a>.</p>

<p>The video about actors is critical if you have a problem that requires using them: <a href="https://developer.apple.com/videos/play/wwdc2021/10133/">https://developer.apple.com/videos/play/wwdc2021/10133</a></p>

<p>Finally, you should also read the documentation of the Sendable: <a href="https://developer.apple.com/documentation/swift/sendable">https://developer.apple.com/documentation/swift/sendable</a>.</p>]]></content><author><name>Marcin Hawro</name></author><category term="blog" /><summary type="html"><![CDATA[This article was written down in the Swift 5.9 and Xcode 15 era.]]></summary></entry></feed>